
NinjaOne software inventory: connect it to LICENSEWARE
NinjaOne (formerly NinjaRMM) is an API integration. Connect it before you export a file.
NinjaOne consolidates asset and software data across managed devices via its Asset Inventory system. The relevant information for SIM is found in:
- Devices, Contains device and hostname information.
- Installed Applications, Lists software applications, including version and publisher details.
We recommend the direct API integration, which lets SIM pull data from NinjaOne automatically with no manual exports.
| Method | Best for | Manual work |
|---|---|---|
| Connect in Licenseware (recommended) | Ongoing, automated data refresh | None after setup |
| Manual export | One-off imports, or where API access isn’t available | Export + import each time |
Prerequisites
Section titled “Prerequisites”Before you begin, ensure the following:
- You have System Administrator access in NinjaOne (required to create a client app under Apps → API).
- Devices are actively reporting and have recent inventory data.
- For manual exports: access to the Reports section.
Connect in Licenseware
Section titled “Connect in Licenseware”This is the standard method. You create a read-only API credential in NinjaOne and enter it on the NinjaOne data source in Datasources. Licenseware then syncs your data automatically, twice a week, so you don’t need to export anything.
Step 1, Create a client app in NinjaOne
Section titled “Step 1, Create a client app in NinjaOne”- Sign in to NinjaOne as a System Administrator.
- Go to Administration.
- Open Apps → API.
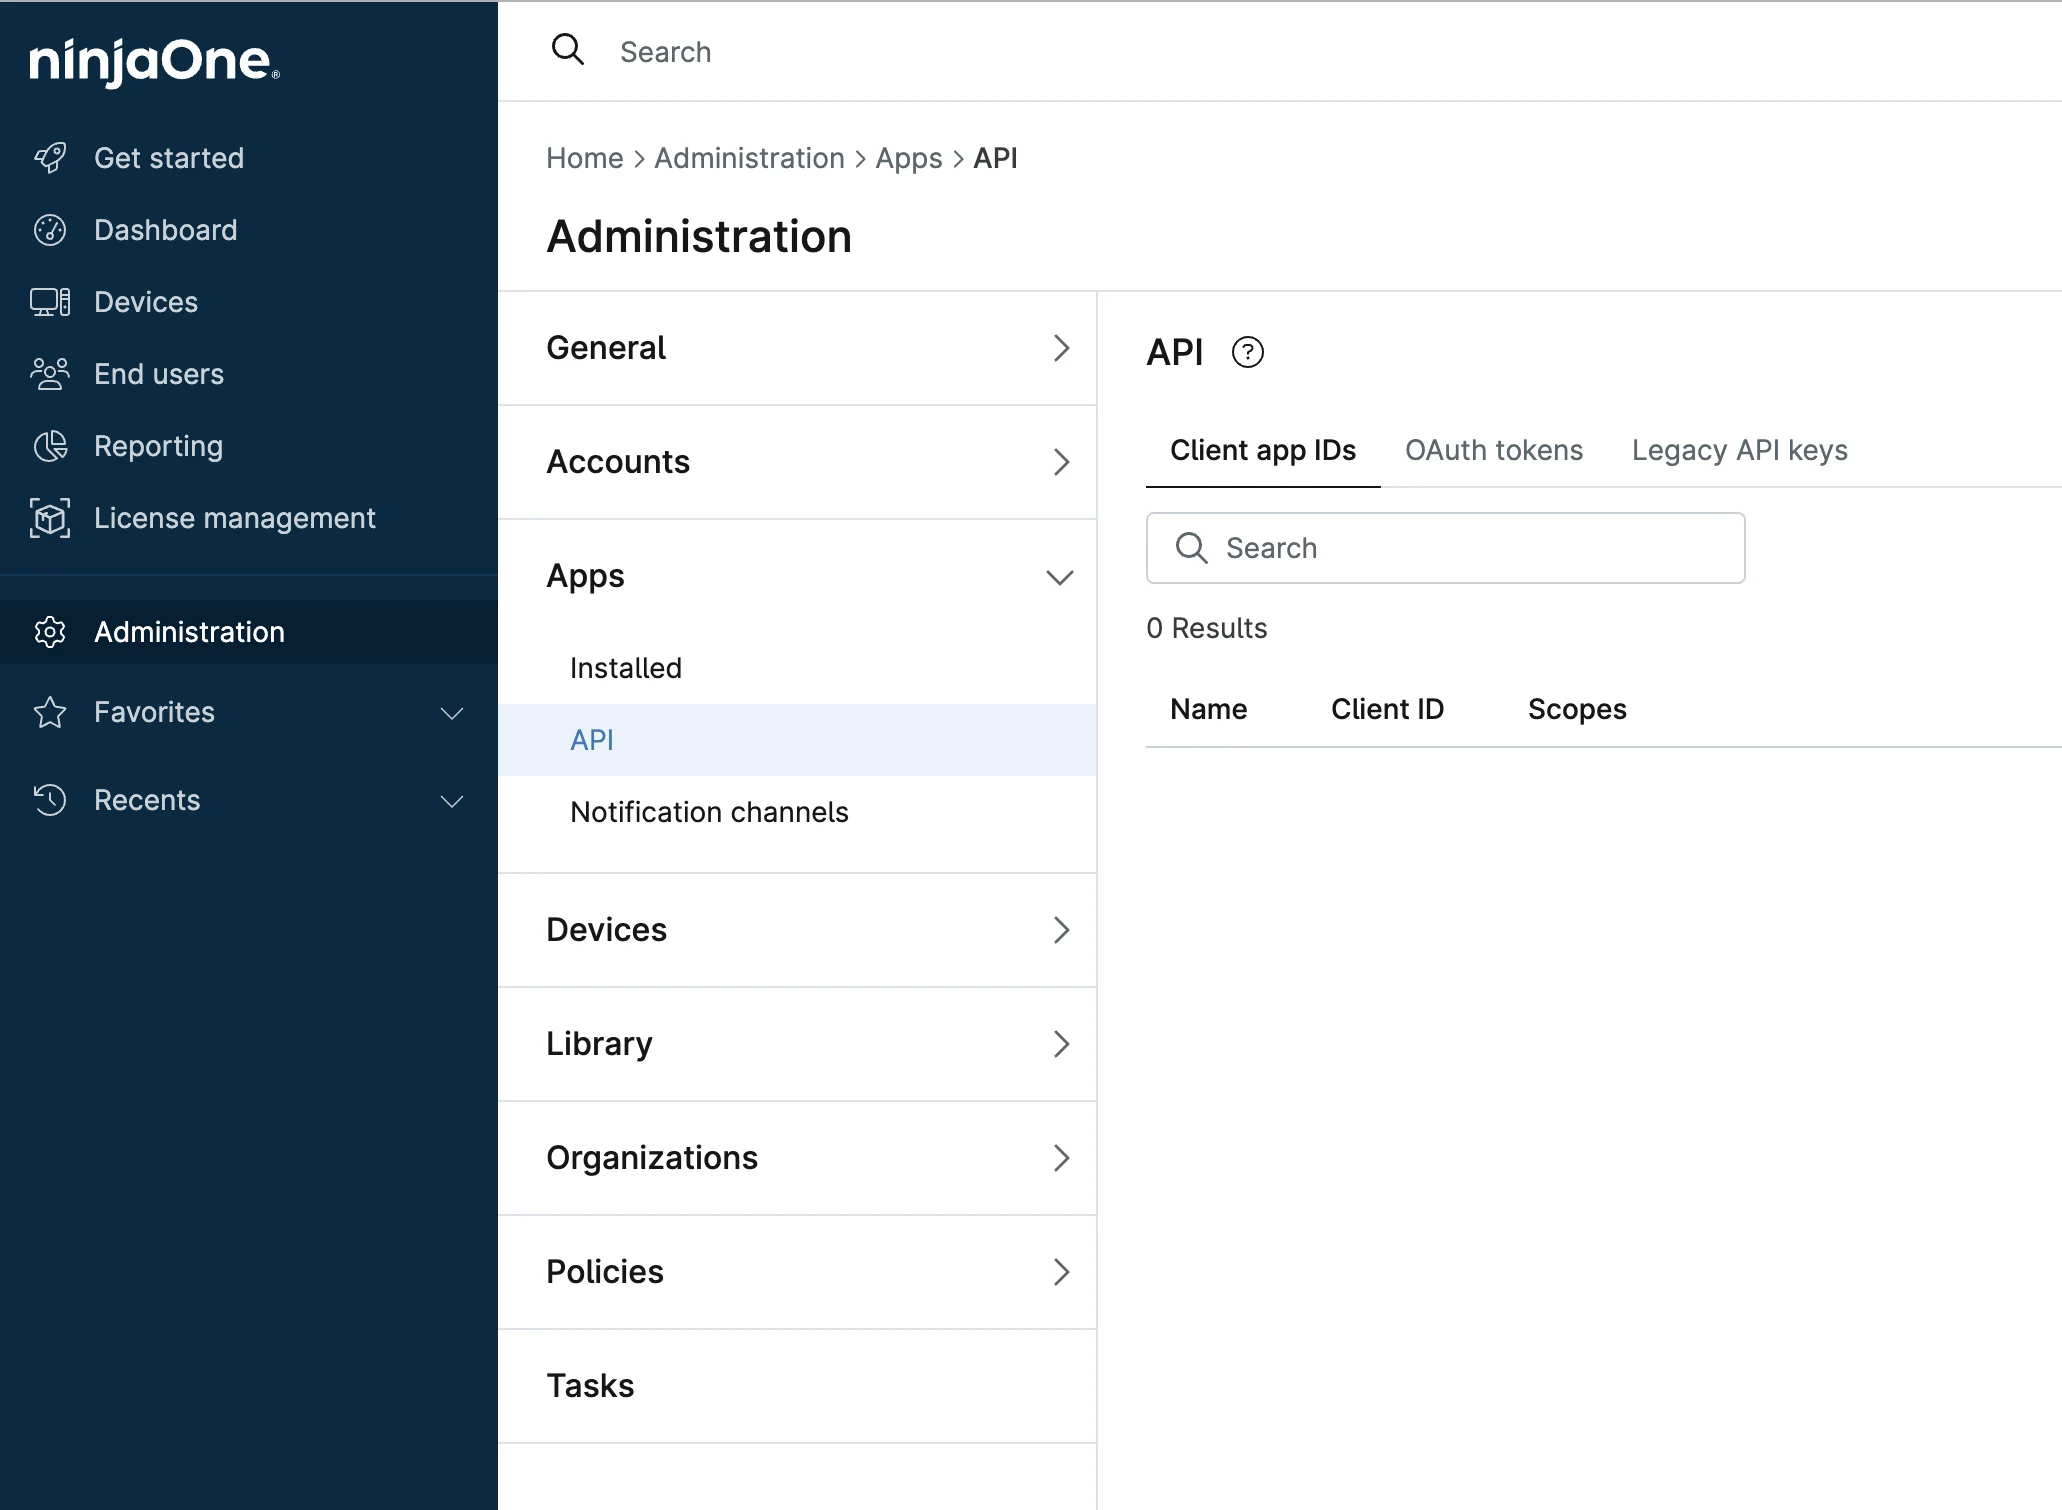
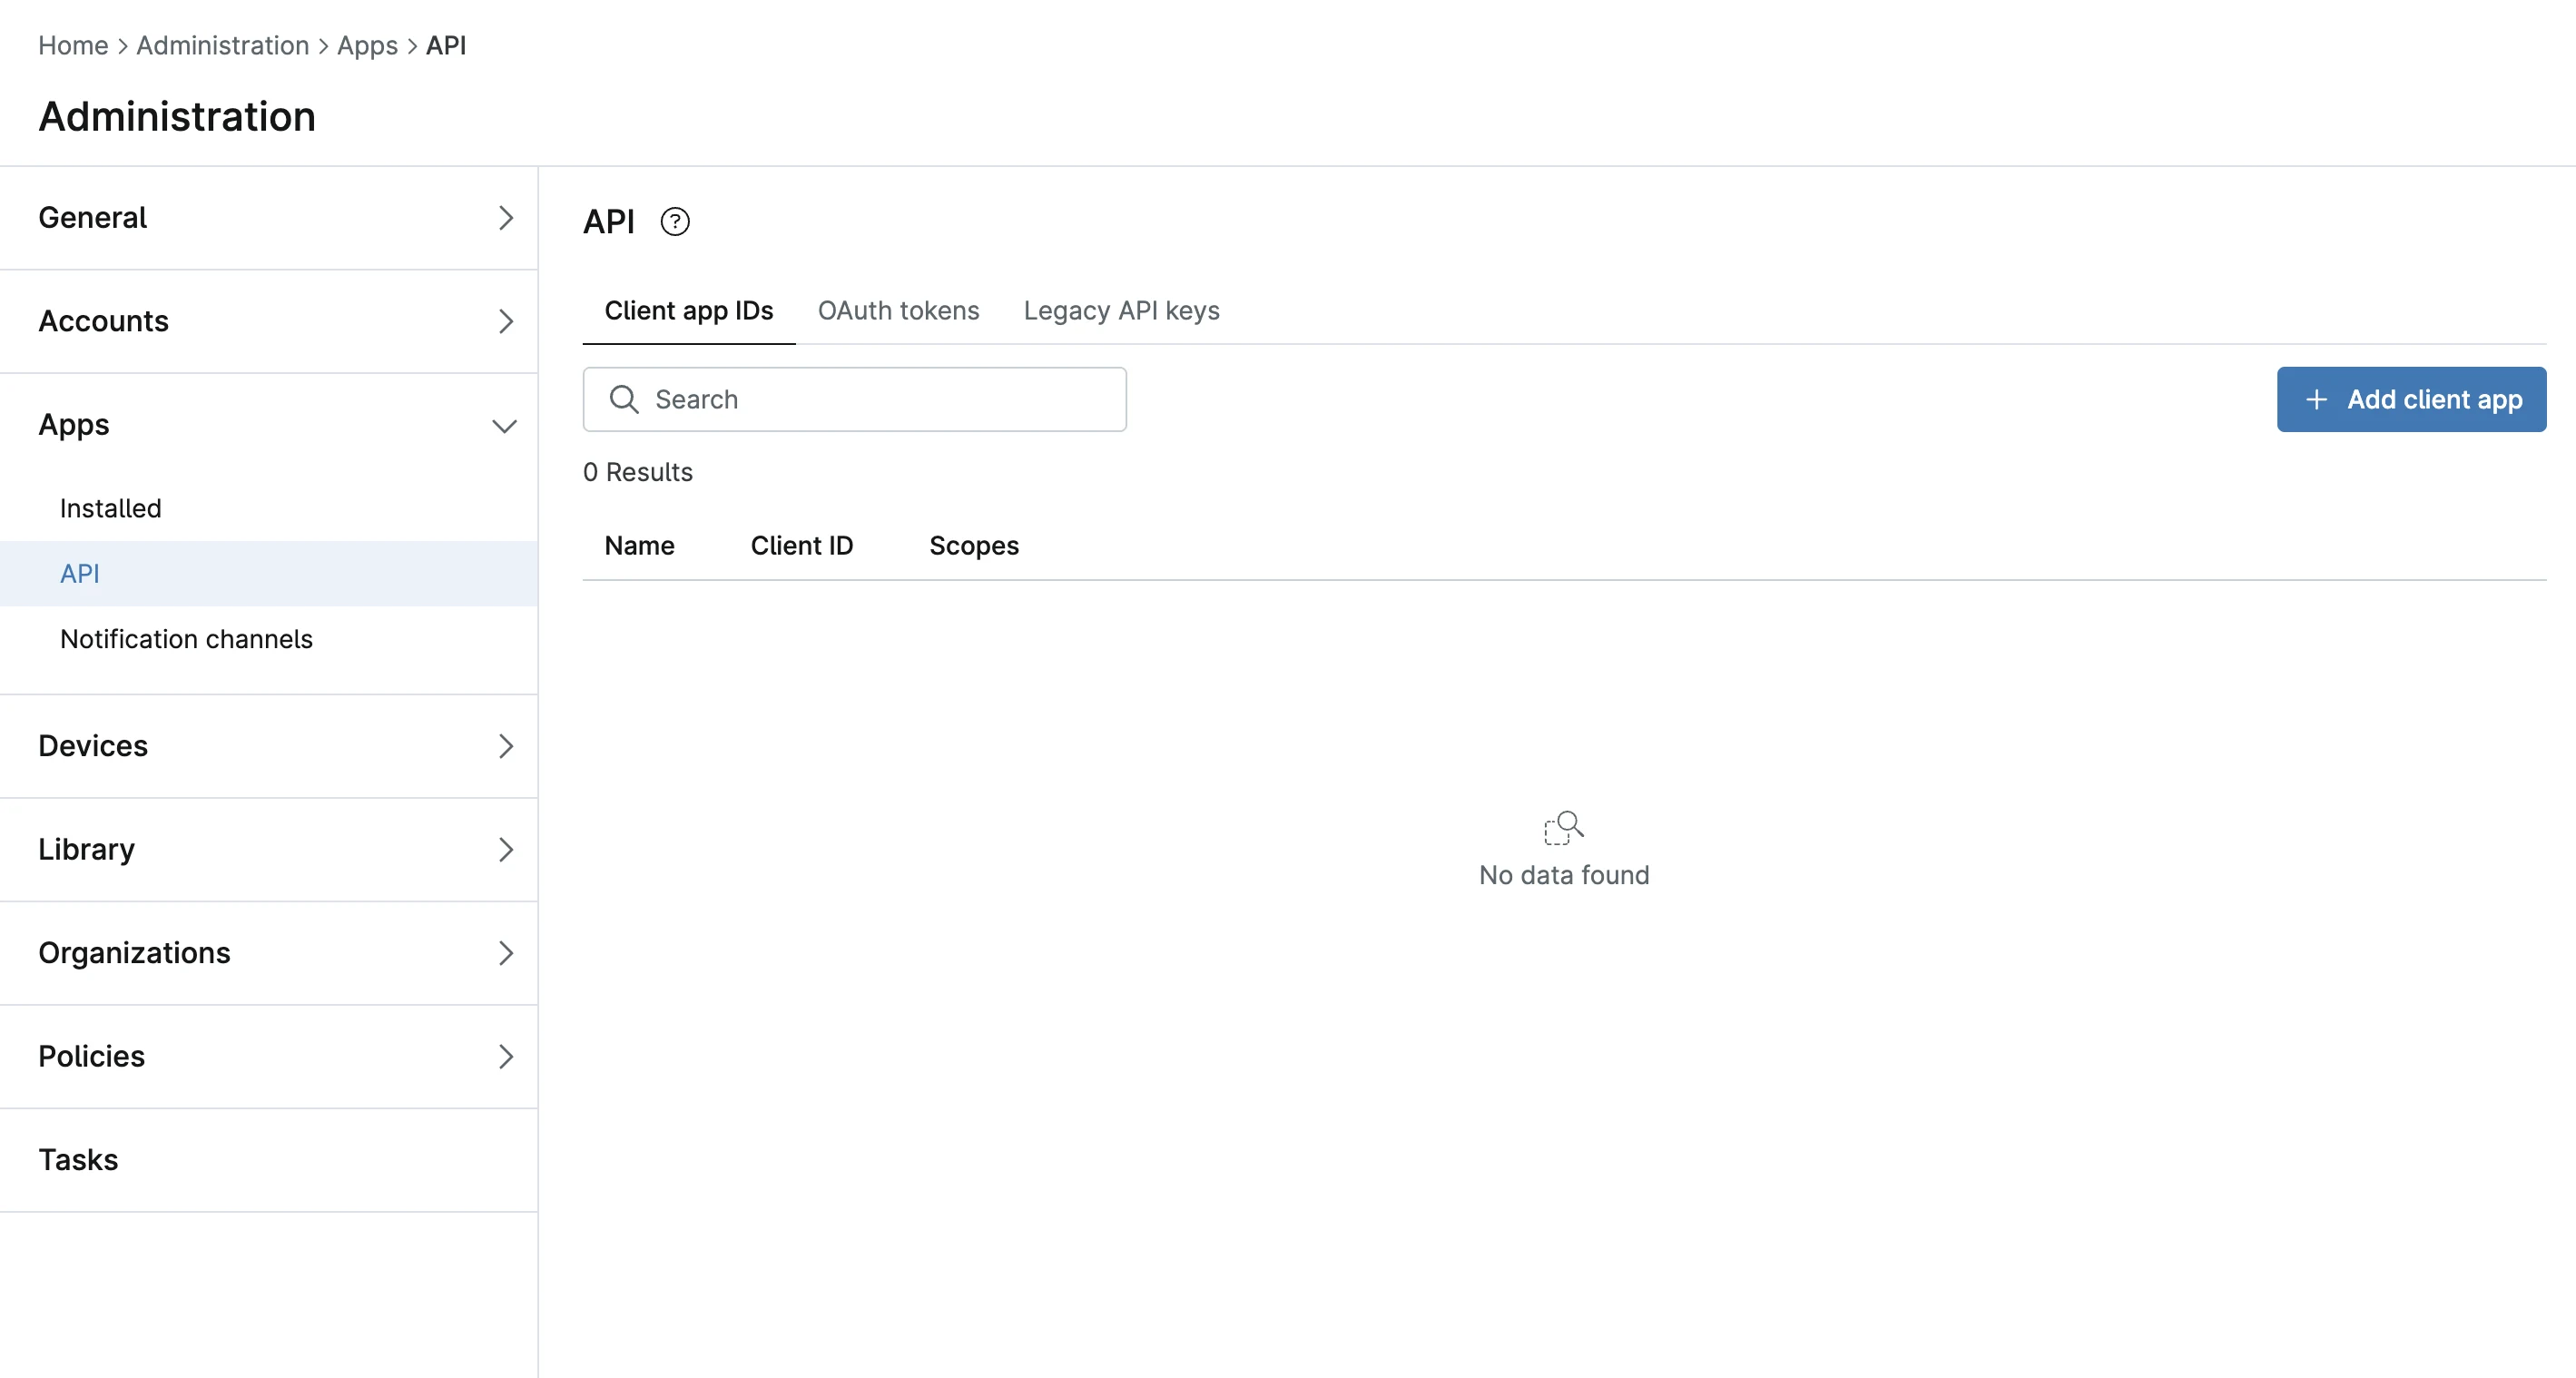
- On the Client app IDs tab, click + Add client app.
- Configure the client app as follows:
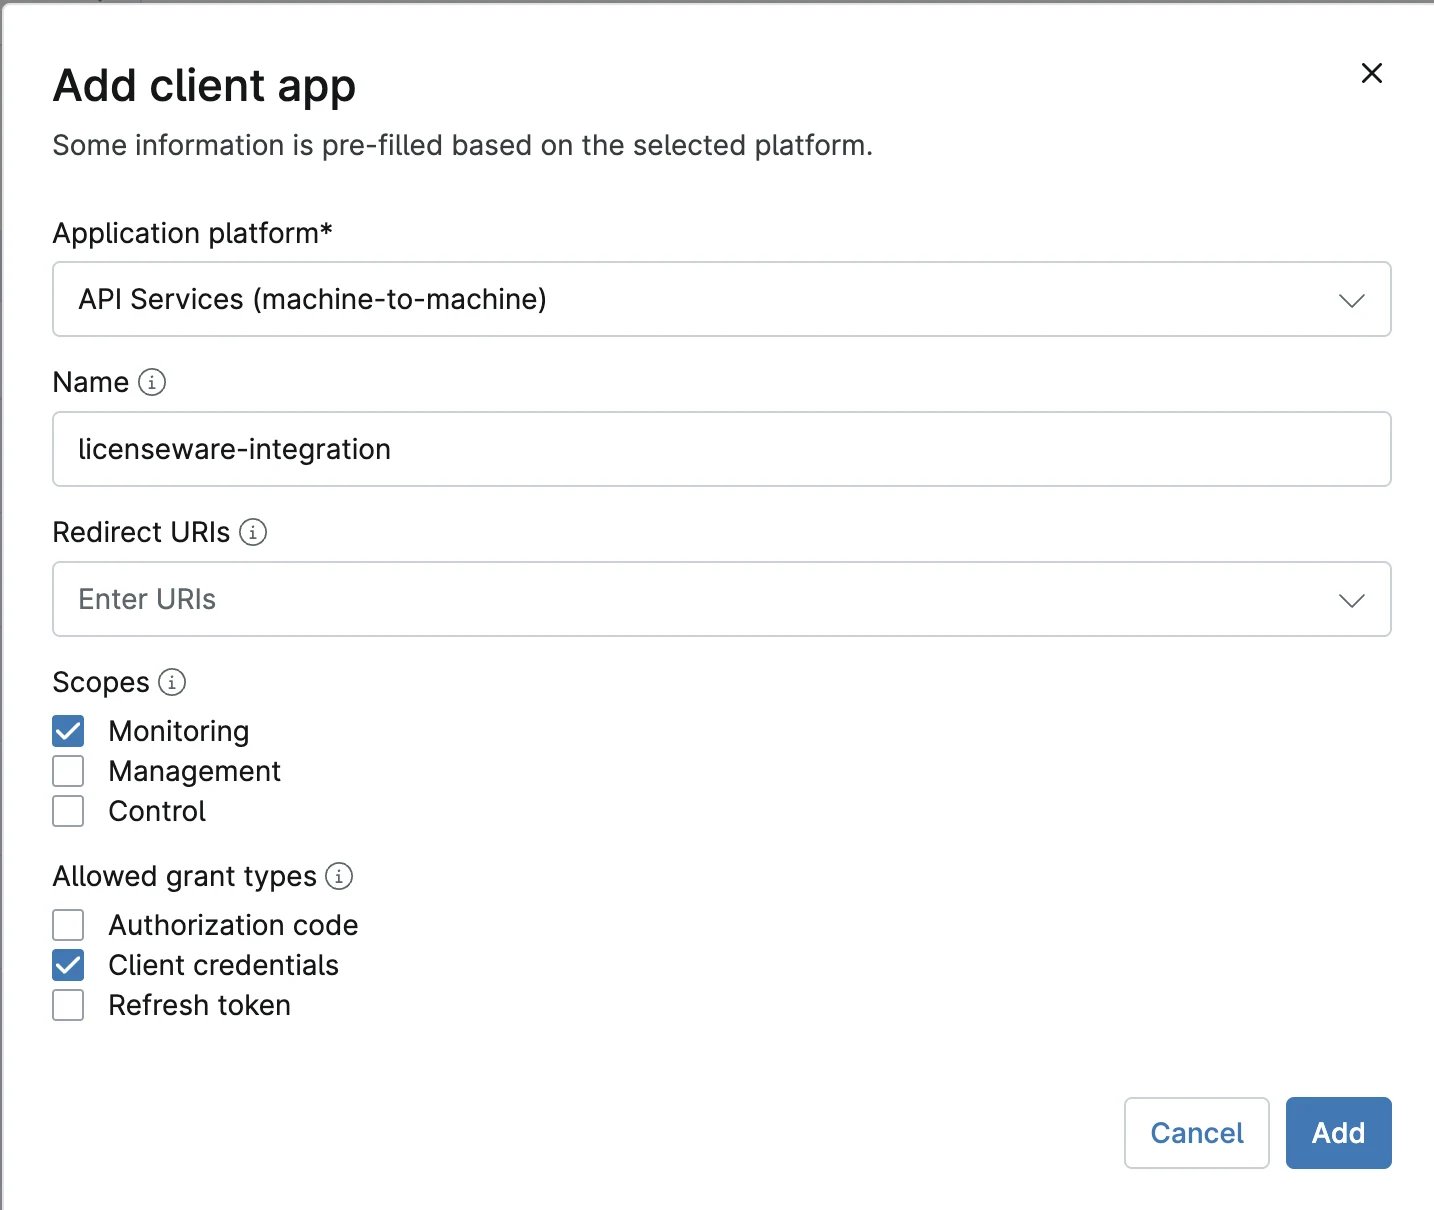
| Field | Value |
|---|---|
| Application platform | API Services (machine-to-machine) |
| Name | licenseware-integration (or any name you’ll recognize) |
| Redirect URIs | Leave empty |
| Scopes | Monitoring only |
| Allowed grant types | Client credentials only |
- Click Add.
Notes:
- Monitoring is the read-only scope. It’s all SIM needs to read device and software inventory, no Management or Control access is required.
- The Redirect URIs field may appear required until you deselect Authorization code. Since only Client credentials is selected, no redirect URI is needed.
Step 2, Copy the client ID and client secret
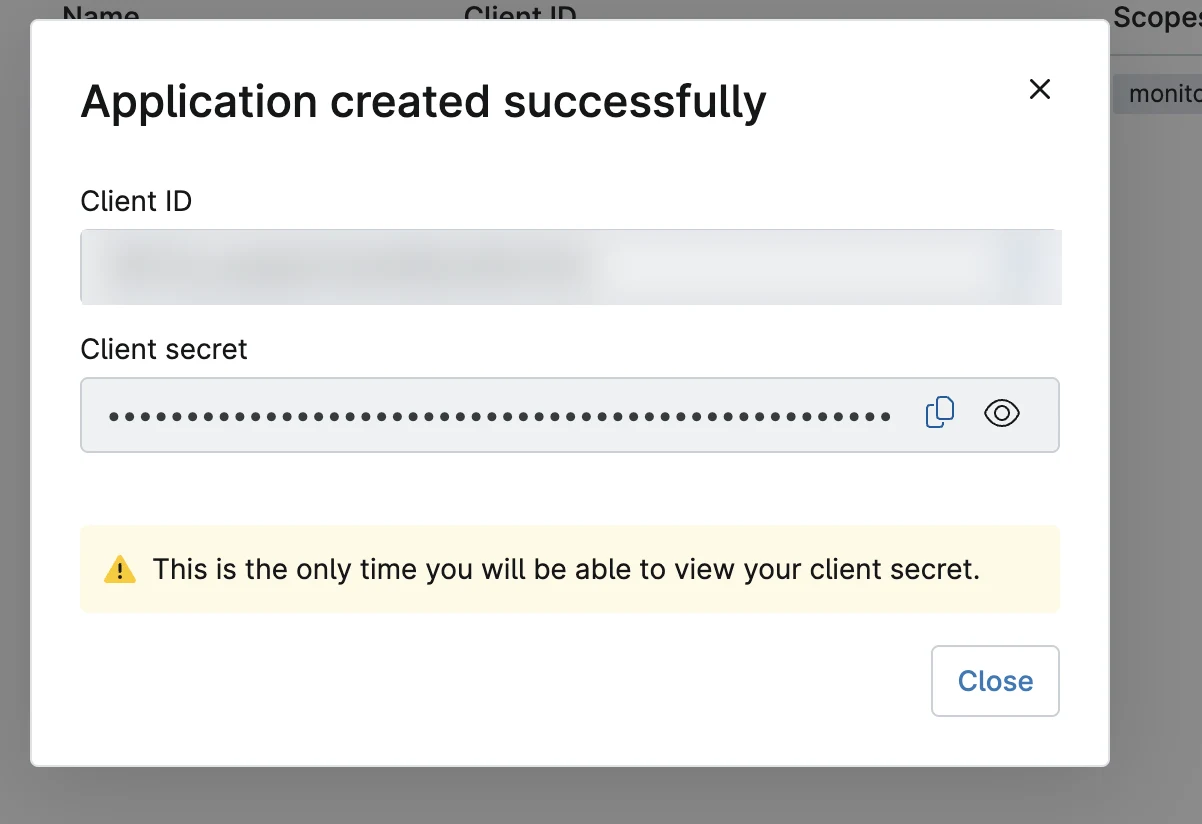
Section titled “Step 2, Copy the client ID and client secret”After you click Add, NinjaOne displays the Client ID and Client Secret.
- The Client Secret is shown only once. Copy it immediately and store it somewhere secure.
- The Client ID remains available afterwards in the Client app IDs list.
Step 3, Find your NinjaOne instance URL
Section titled “Step 3, Find your NinjaOne instance URL”Licenseware needs to know which regional NinjaOne instance to connect to. This is the base URL shown in your browser’s address bar while you’re signed in to NinjaOne, sometimes called the geolocation URL. It will be one of:
| Region | Instance URL |
|---|---|
| United States | app.ninjarmm.com |
| United States (US2) | us2.ninjarmm.com |
| Europe | eu.ninjarmm.com |
| Canada | ca.ninjarmm.com |
| Oceania | oc.ninjarmm.com |
The integration must use the same regional host as your console. If you pick the wrong region, the connection will fail.
Step 4, Enter the credentials in Licenseware
Section titled “Step 4, Enter the credentials in Licenseware”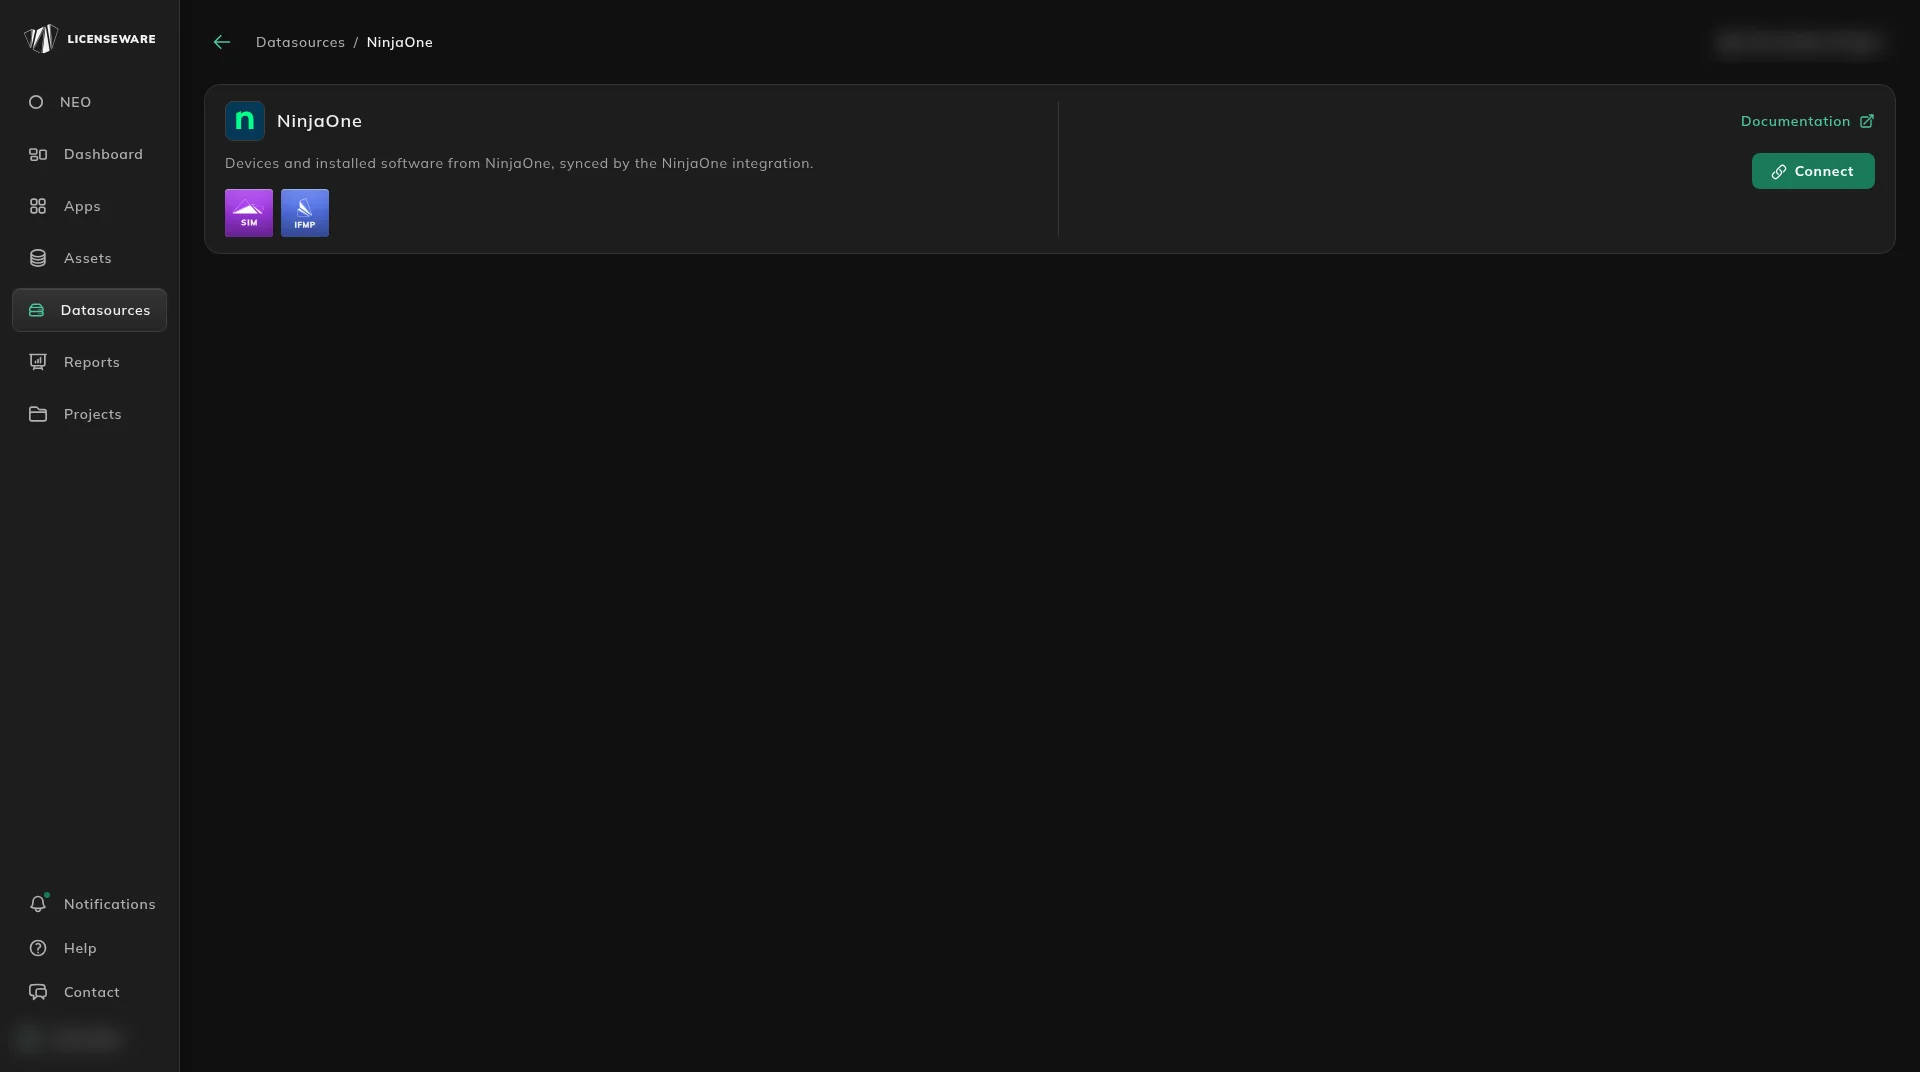
- In Licenseware, open Datasources and click NinjaOne.
- Click Connect.
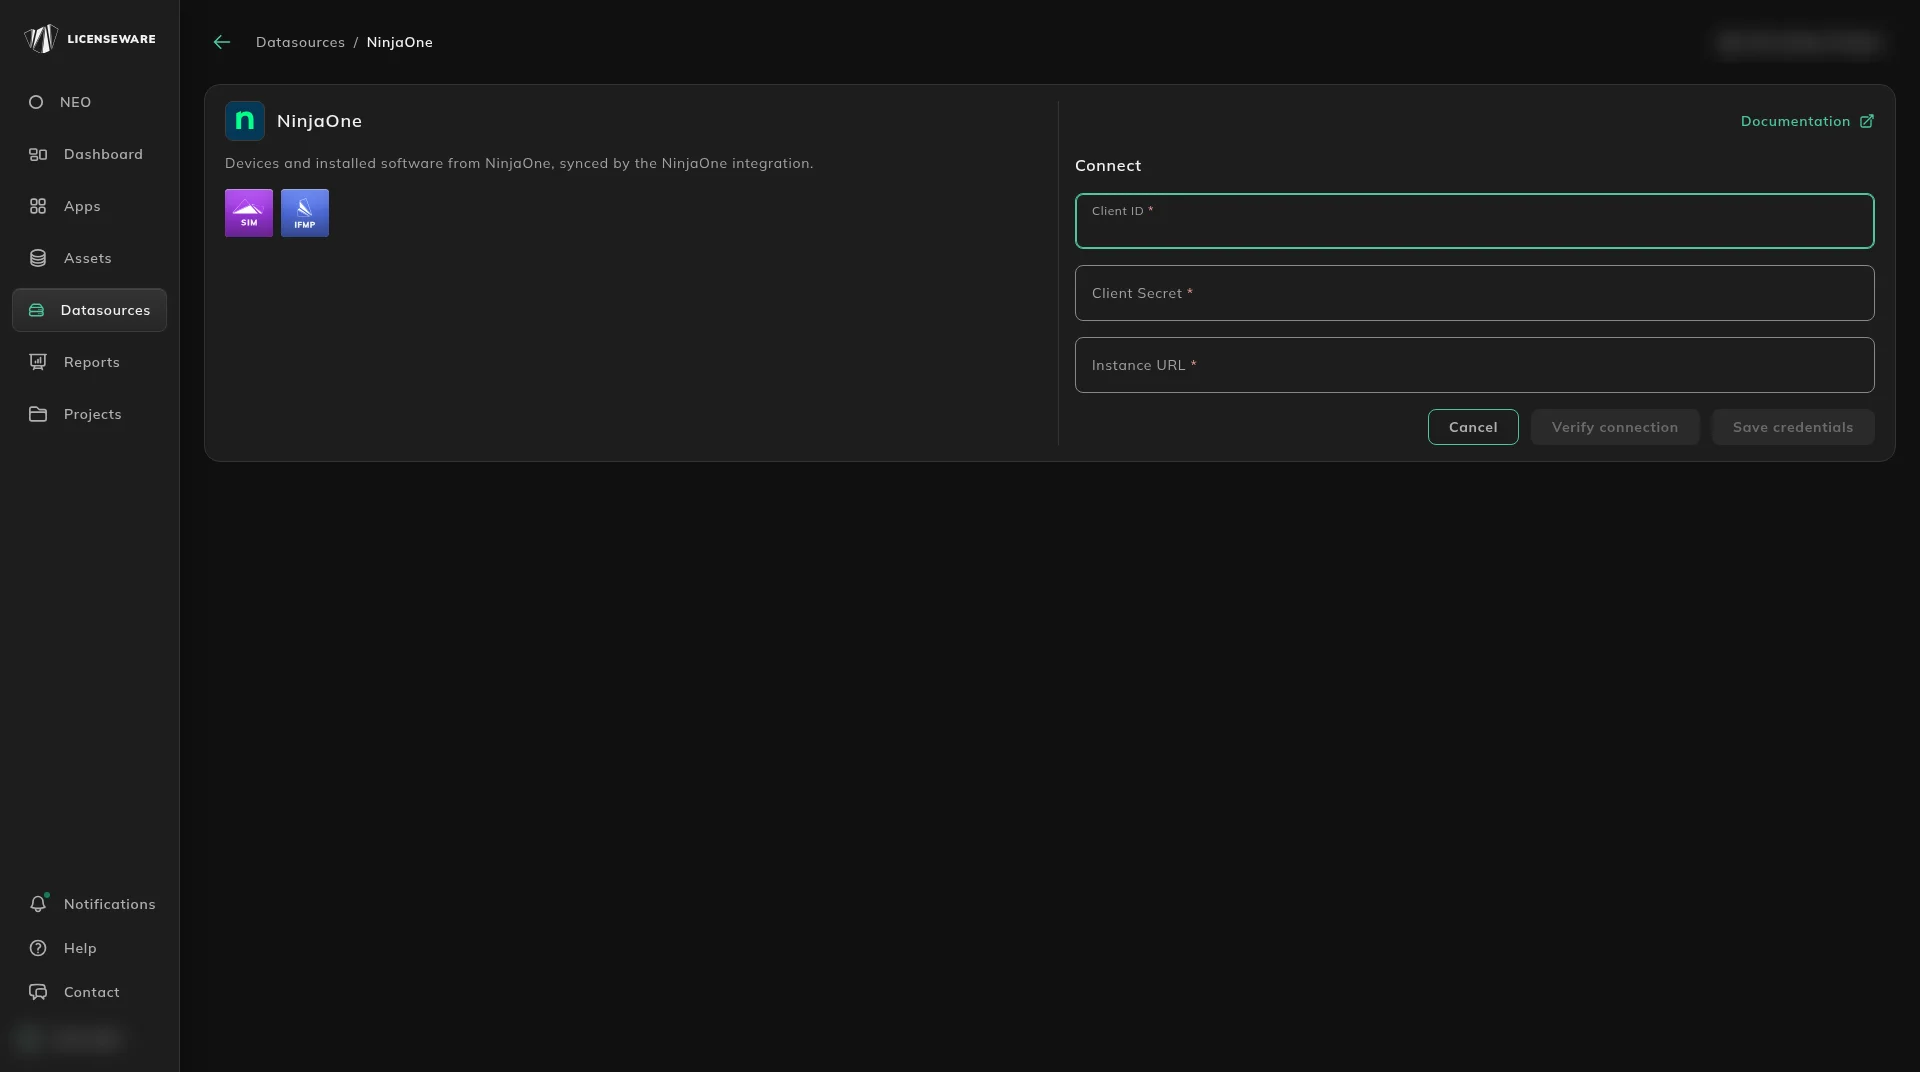
- Enter the required fields:
- Client ID
- Client Secret
- Instance URL, your NinjaOne instance from Step 3
- Click Verify connection, then Save credentials.
See Data sources for how to check a connection.
Once connected, Licenseware authenticates to NinjaOne with the client credentials and pulls device and installed-application data directly.
If you can’t connect
Section titled “If you can’t connect”Use this method for a one-off import, or where you can’t create an API client app.
- Log into the NinjaOne Admin Console.
- Navigate to Reports → Assets → Installed Applications.
- Use the filter options to include all devices (or a specific subset as required).
- Click Generate Report.
- Once the report is displayed, click Export → CSV.
- Save the file (e.g.,
NinjaOne_SIM_Export.csv).
Ensure the following columns are present in your export:
| Field Name | Description |
|---|---|
| Device Name | Hostname or endpoint identifier |
| Application Name | Installed software name |
| Version | Software version number |
| Publisher | Software vendor or publisher |
Then upload it with the SIM template.