Extract a contract from a document (OCR)
Upload a contract. NEO reads the PDF, the scan or the screenshot and extracts the terms and the licenses. You review what it found, then save the contract, update one you already hold, or keep the licenses without a contract.
Open the Documents tab
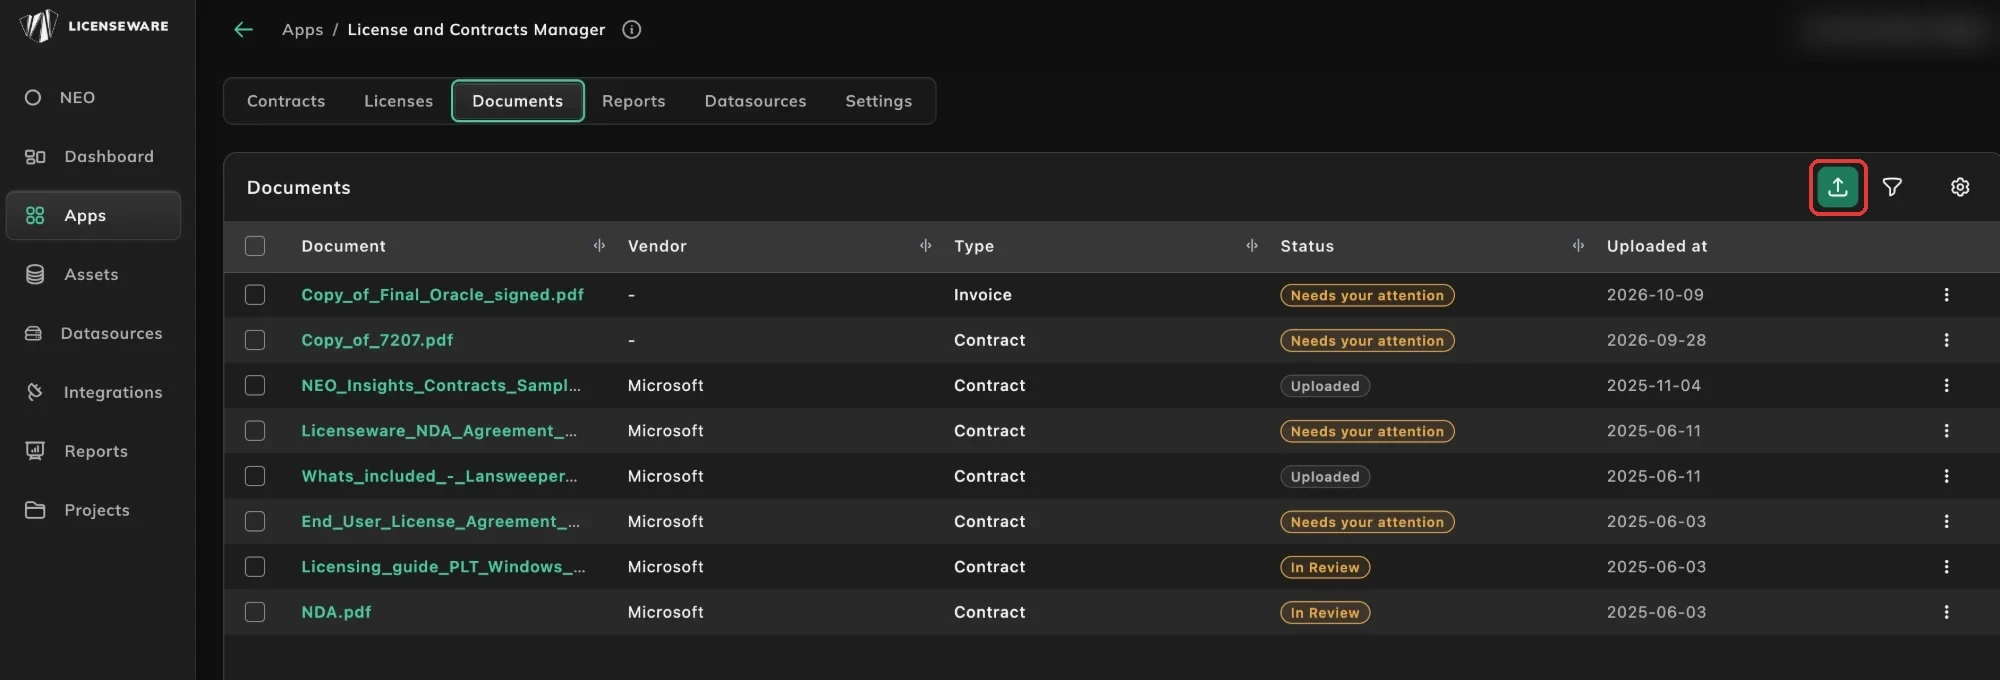
Section titled “Open the Documents tab”In LCM, open the Documents tab. It lists every uploaded document with its vendor, type, status and upload date. Use the filter to narrow the list, and the menu at the end of each row to act on a document.
Upload documents
Section titled “Upload documents”- Click the upload button at the top right of the list.
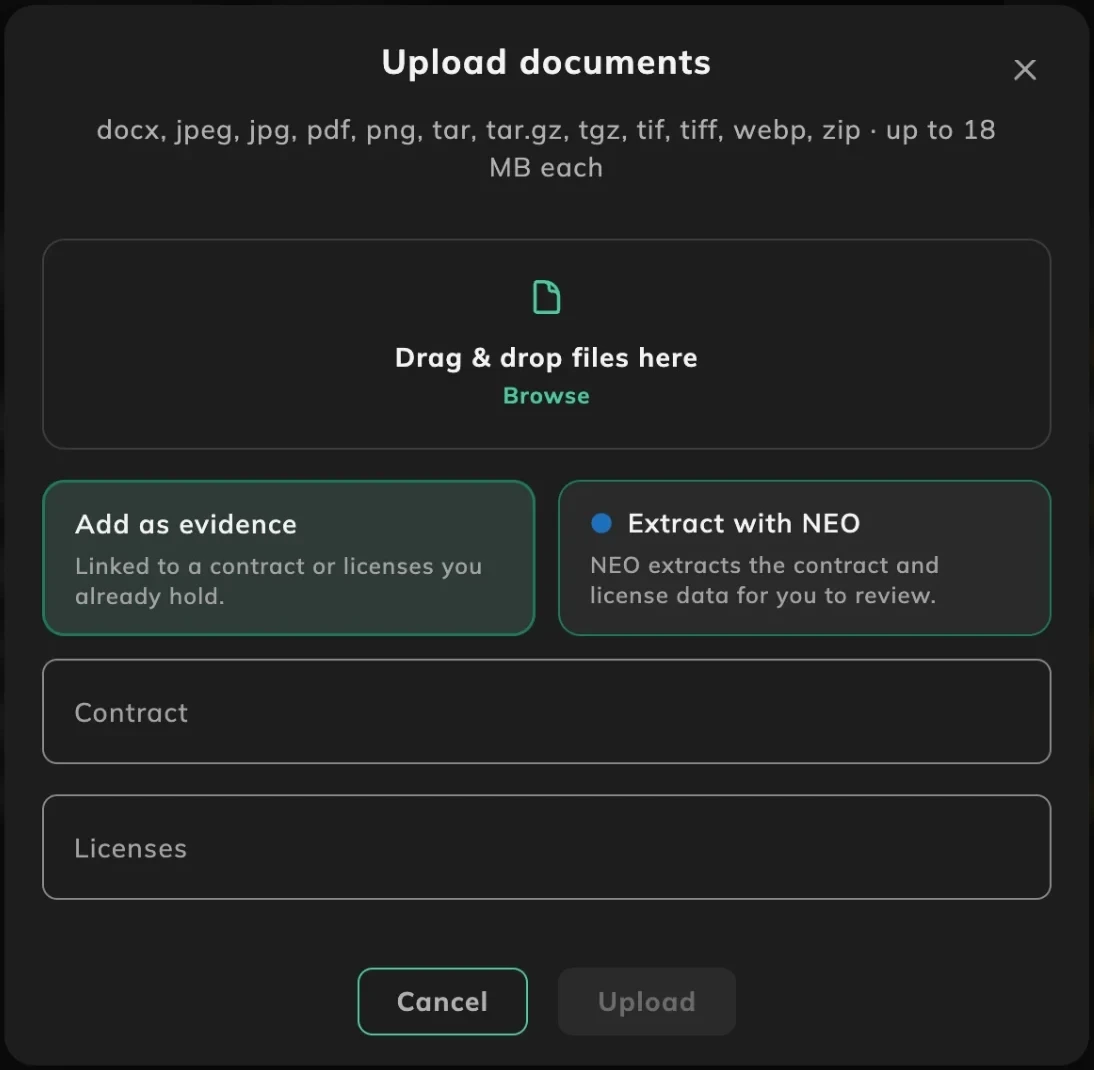
- Drag your files into the dialog, or click Browse to select them. Each file can be up to 18 MB, in any of these formats: docx, jpeg, jpg, pdf, png, tar, tar.gz, tgz, tif, tiff, webp or zip.
- Choose what to do with the files:
- Add as evidence links them to a contract or licenses you already hold. Pick the Contract and Licenses they belong to.
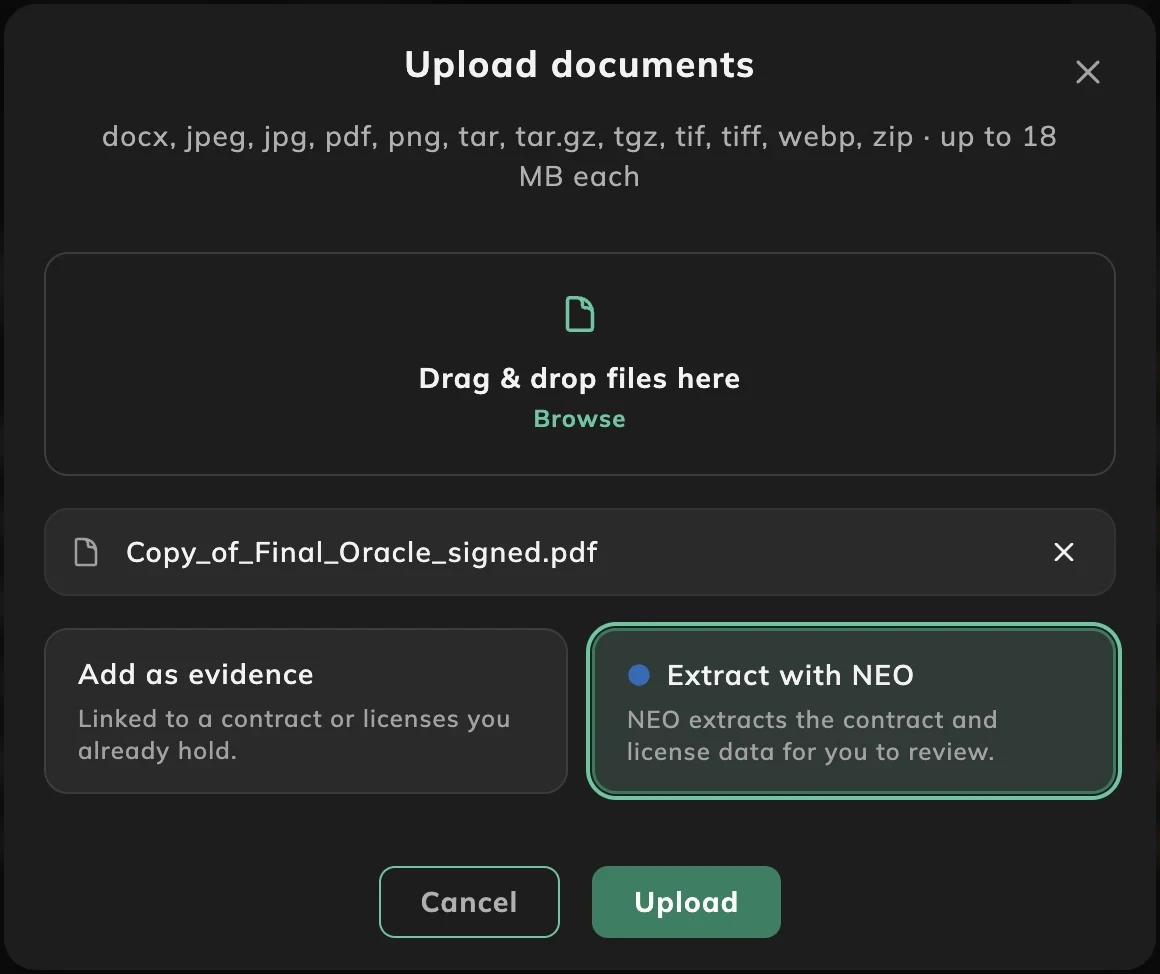
- Extract with NEO has NEO read the documents and extract the contract and license data for you to review.
- Click Upload. Upload stays off until a file is in the box.
The document is then attached to the contract or license you chose. Anyone who can open that record can see it, and it is available for AI analysis. The same files are the input for NEO’s contract risk notes, which read the agreement for risk, a market comparison and a negotiation brief.
Check the status
Section titled “Check the status”Each document’s Status shows where it is, such as Uploaded, In Review or Needs your attention.
Needs your attention means NEO has read the document and can use it to update the contract and licenses. Open it, review what NEO found, and accept the changes. The review steps are below.
Review what NEO extracts
Section titled “Review what NEO extracts”When you choose Extract with NEO, NEO reads the document and proposes the contract and licenses it describes. Nothing is added to your records until you review it.
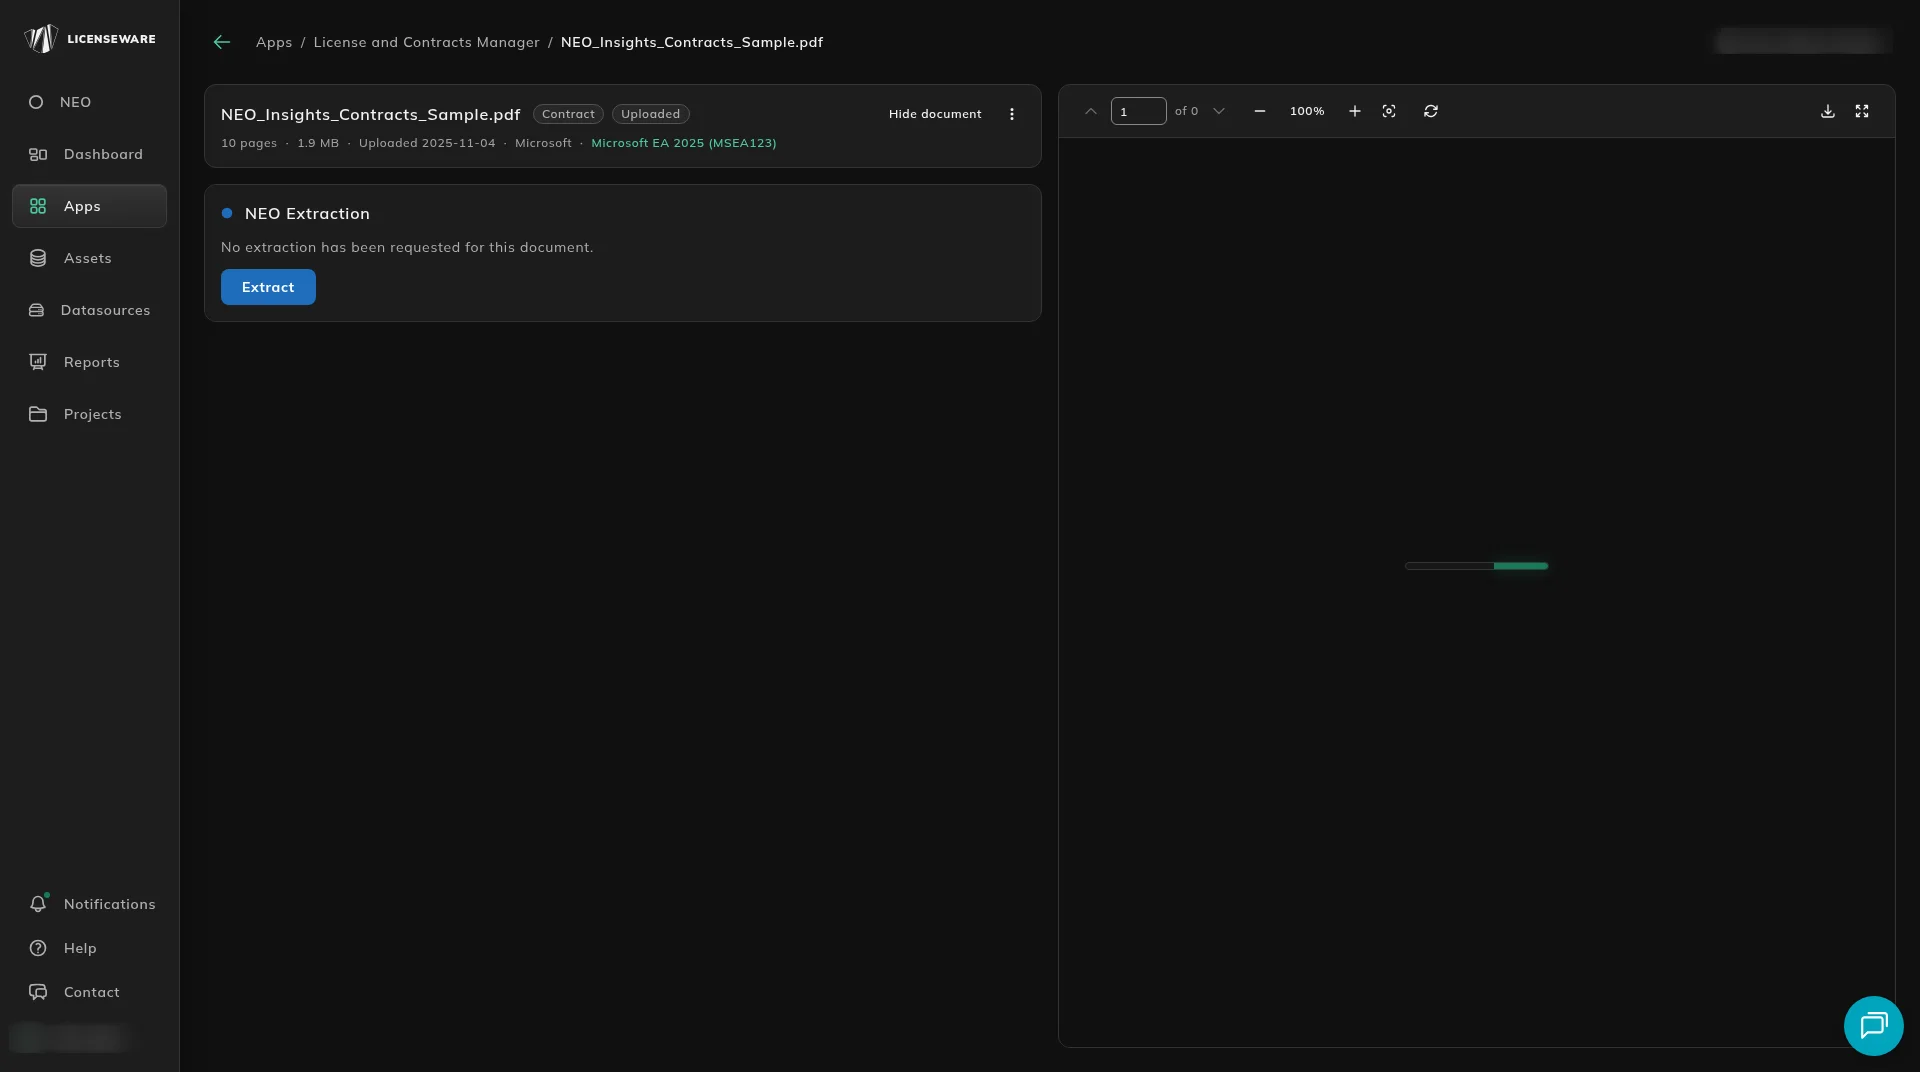
A file you already uploaded as evidence has no extraction yet. Open it from Documents. NEO Extraction says No extraction has been requested for this document. Click Extract.
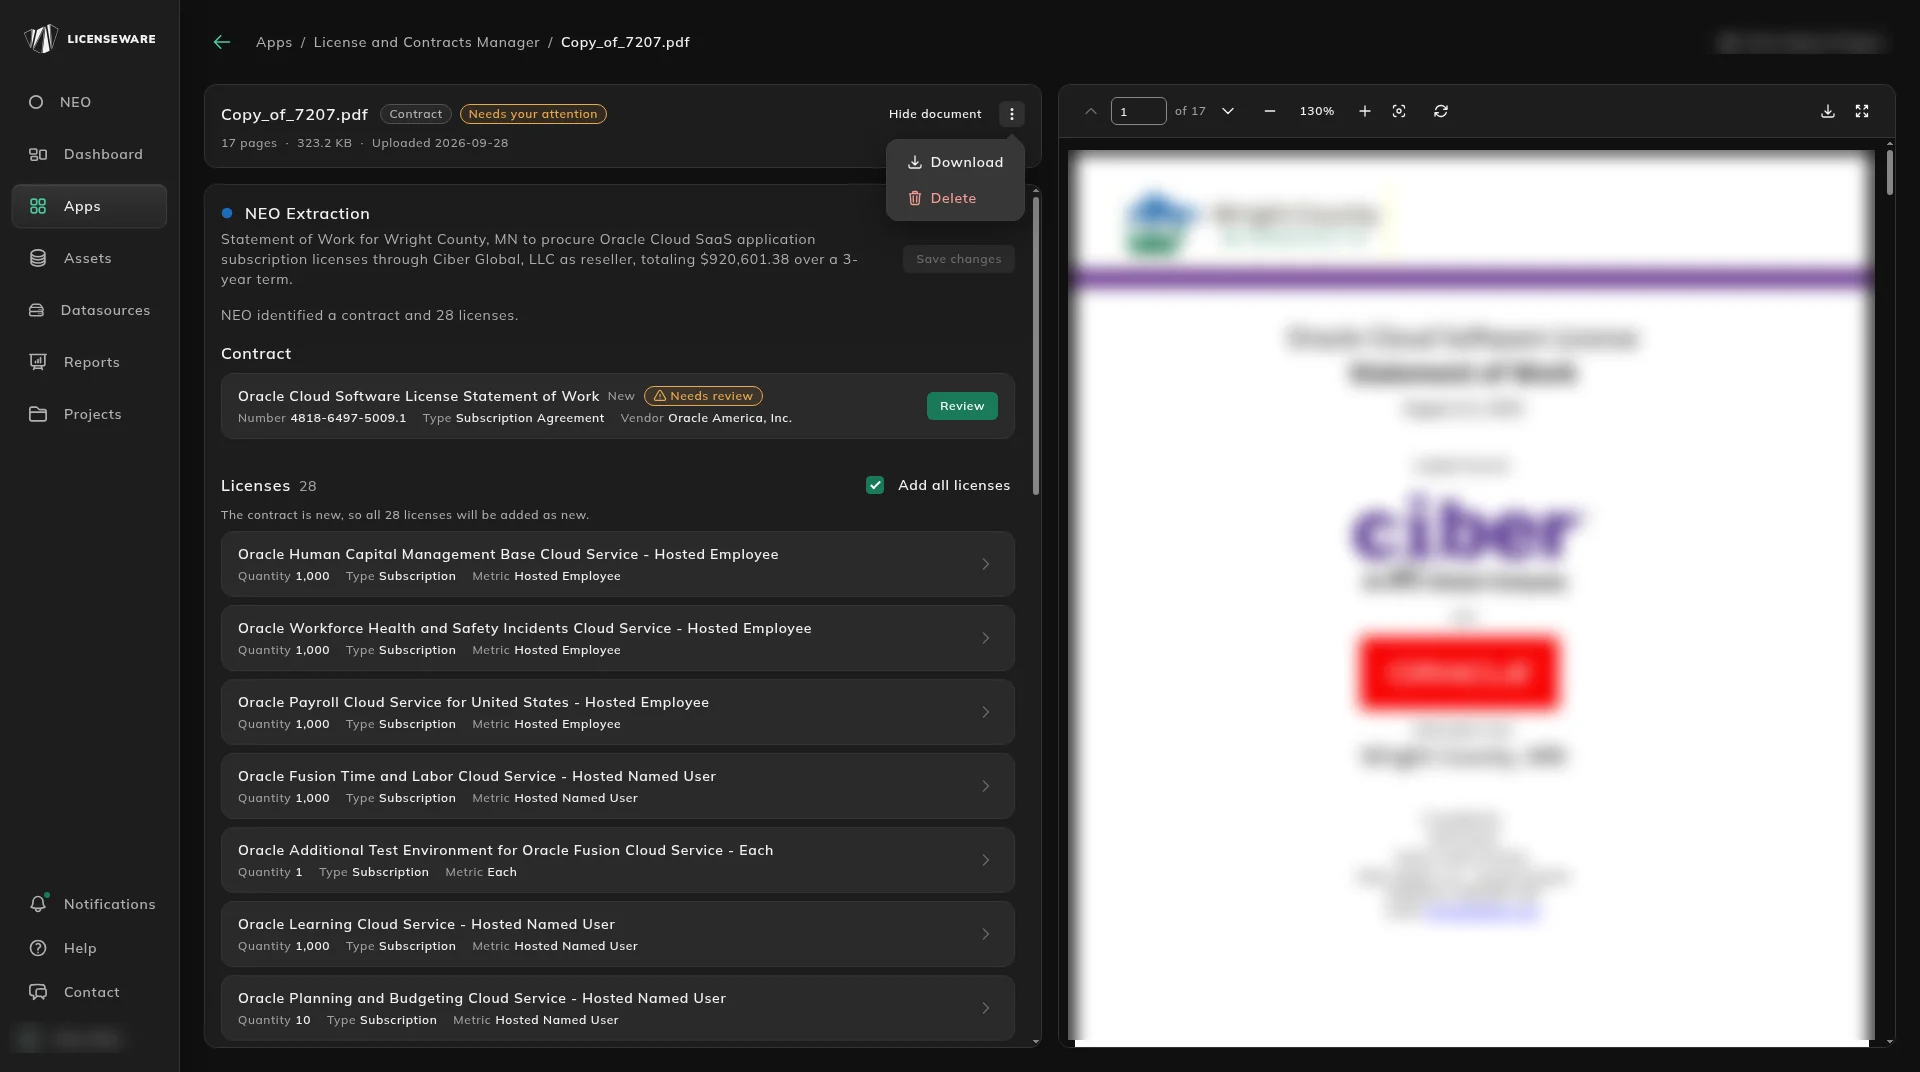
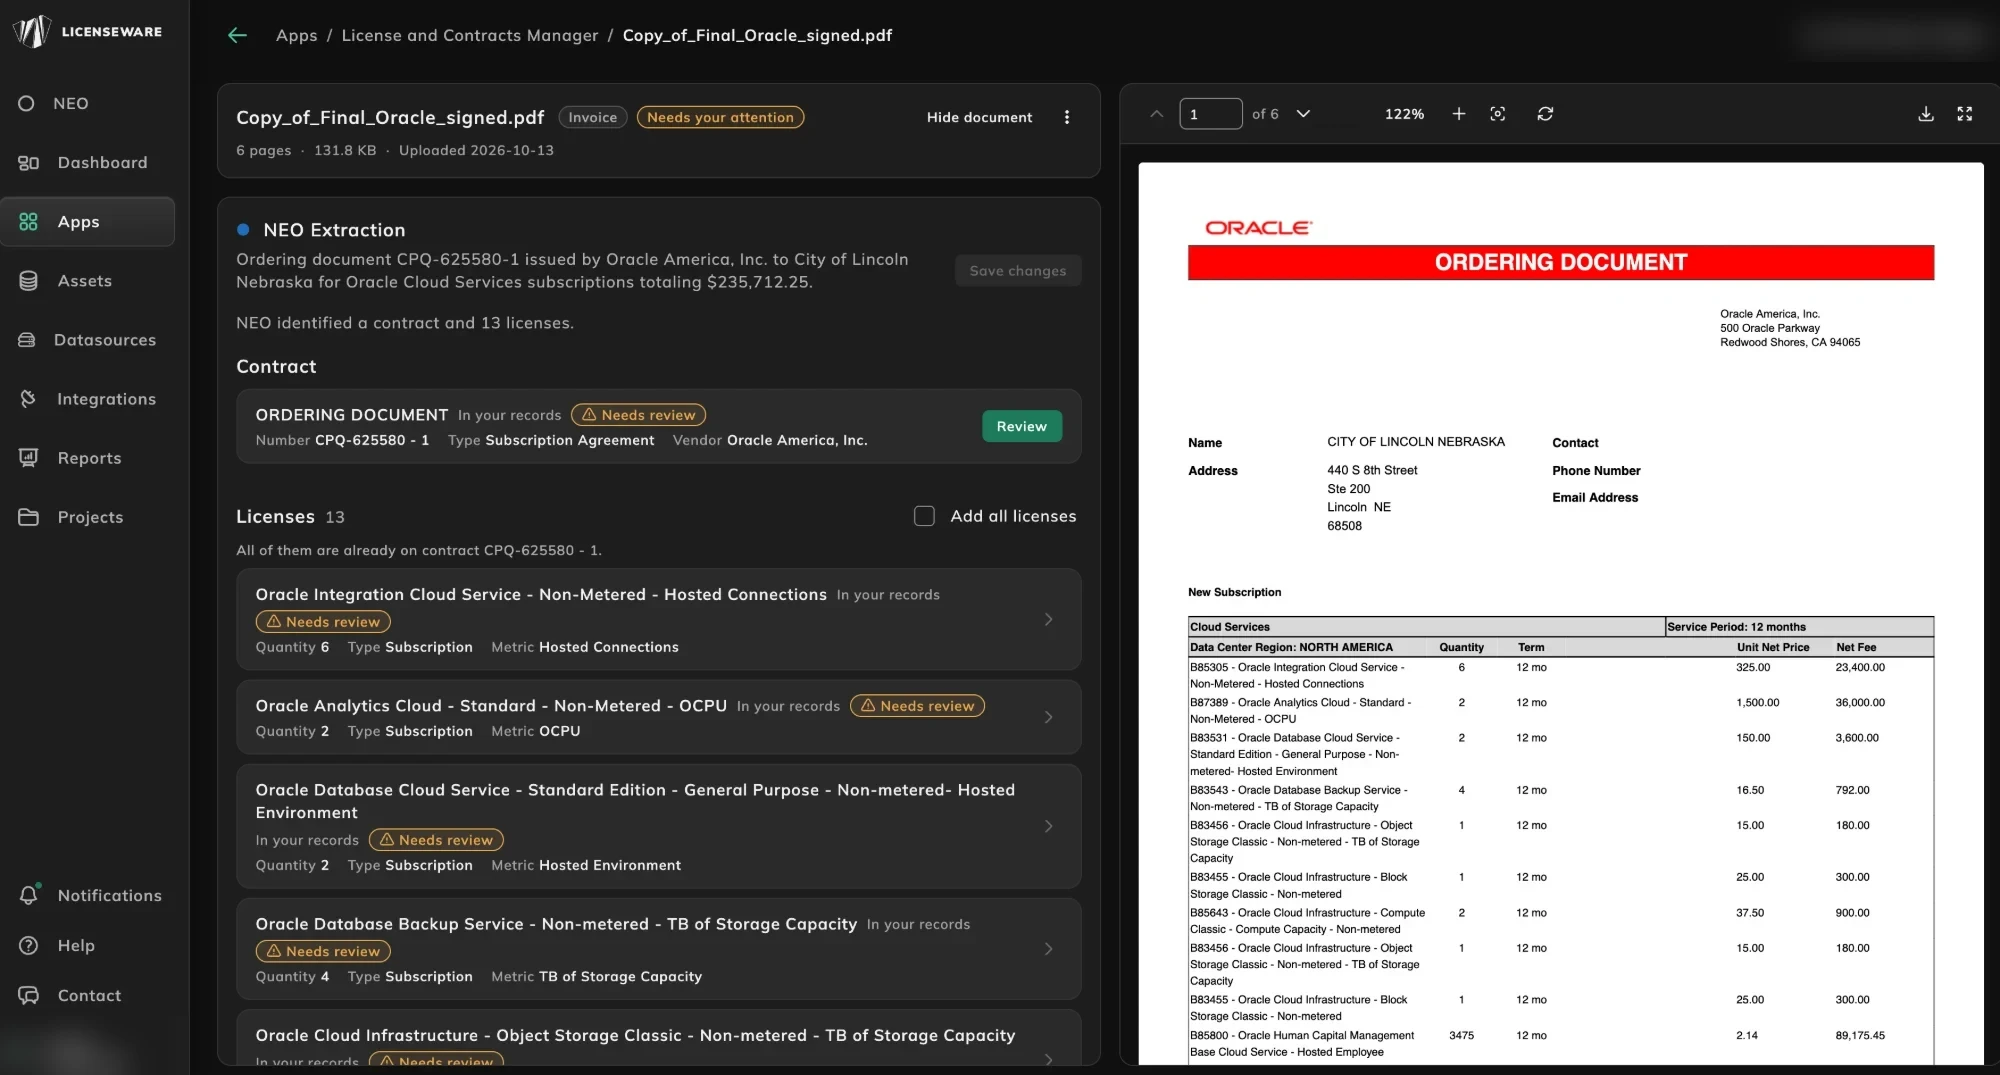
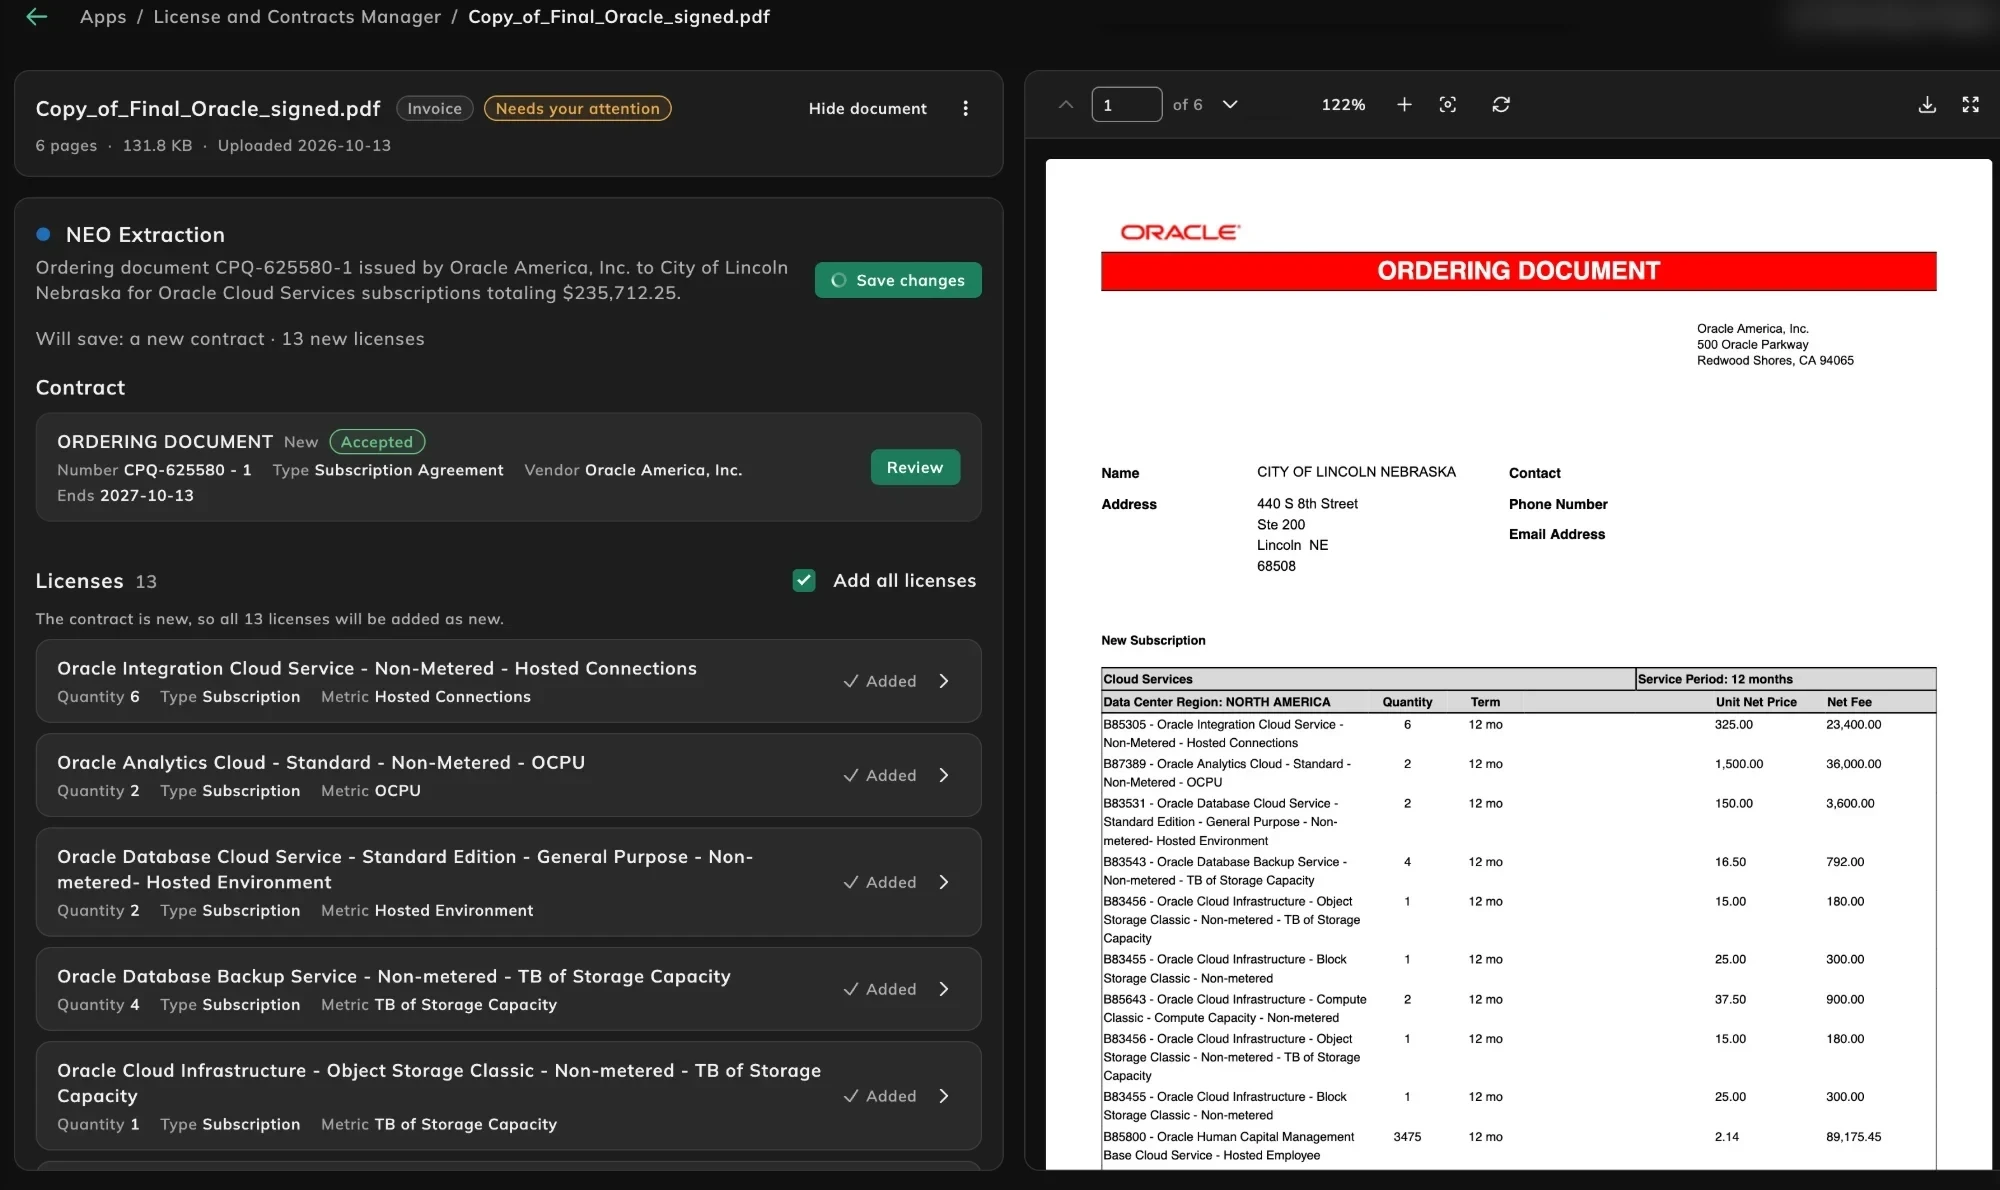
Open the document from the Documents tab. The header shows the filename, a type badge, the status, the page count, the size, the upload date, and Hide document. The menu beside Hide document is Download and Delete. The NEO Extraction panel summarizes what NEO found and lists the contract and each license, with the document itself alongside for comparison. Items that match something you already hold are marked In your records, and anything waiting on you is marked Needs review. A new item is marked New.
Review the contract
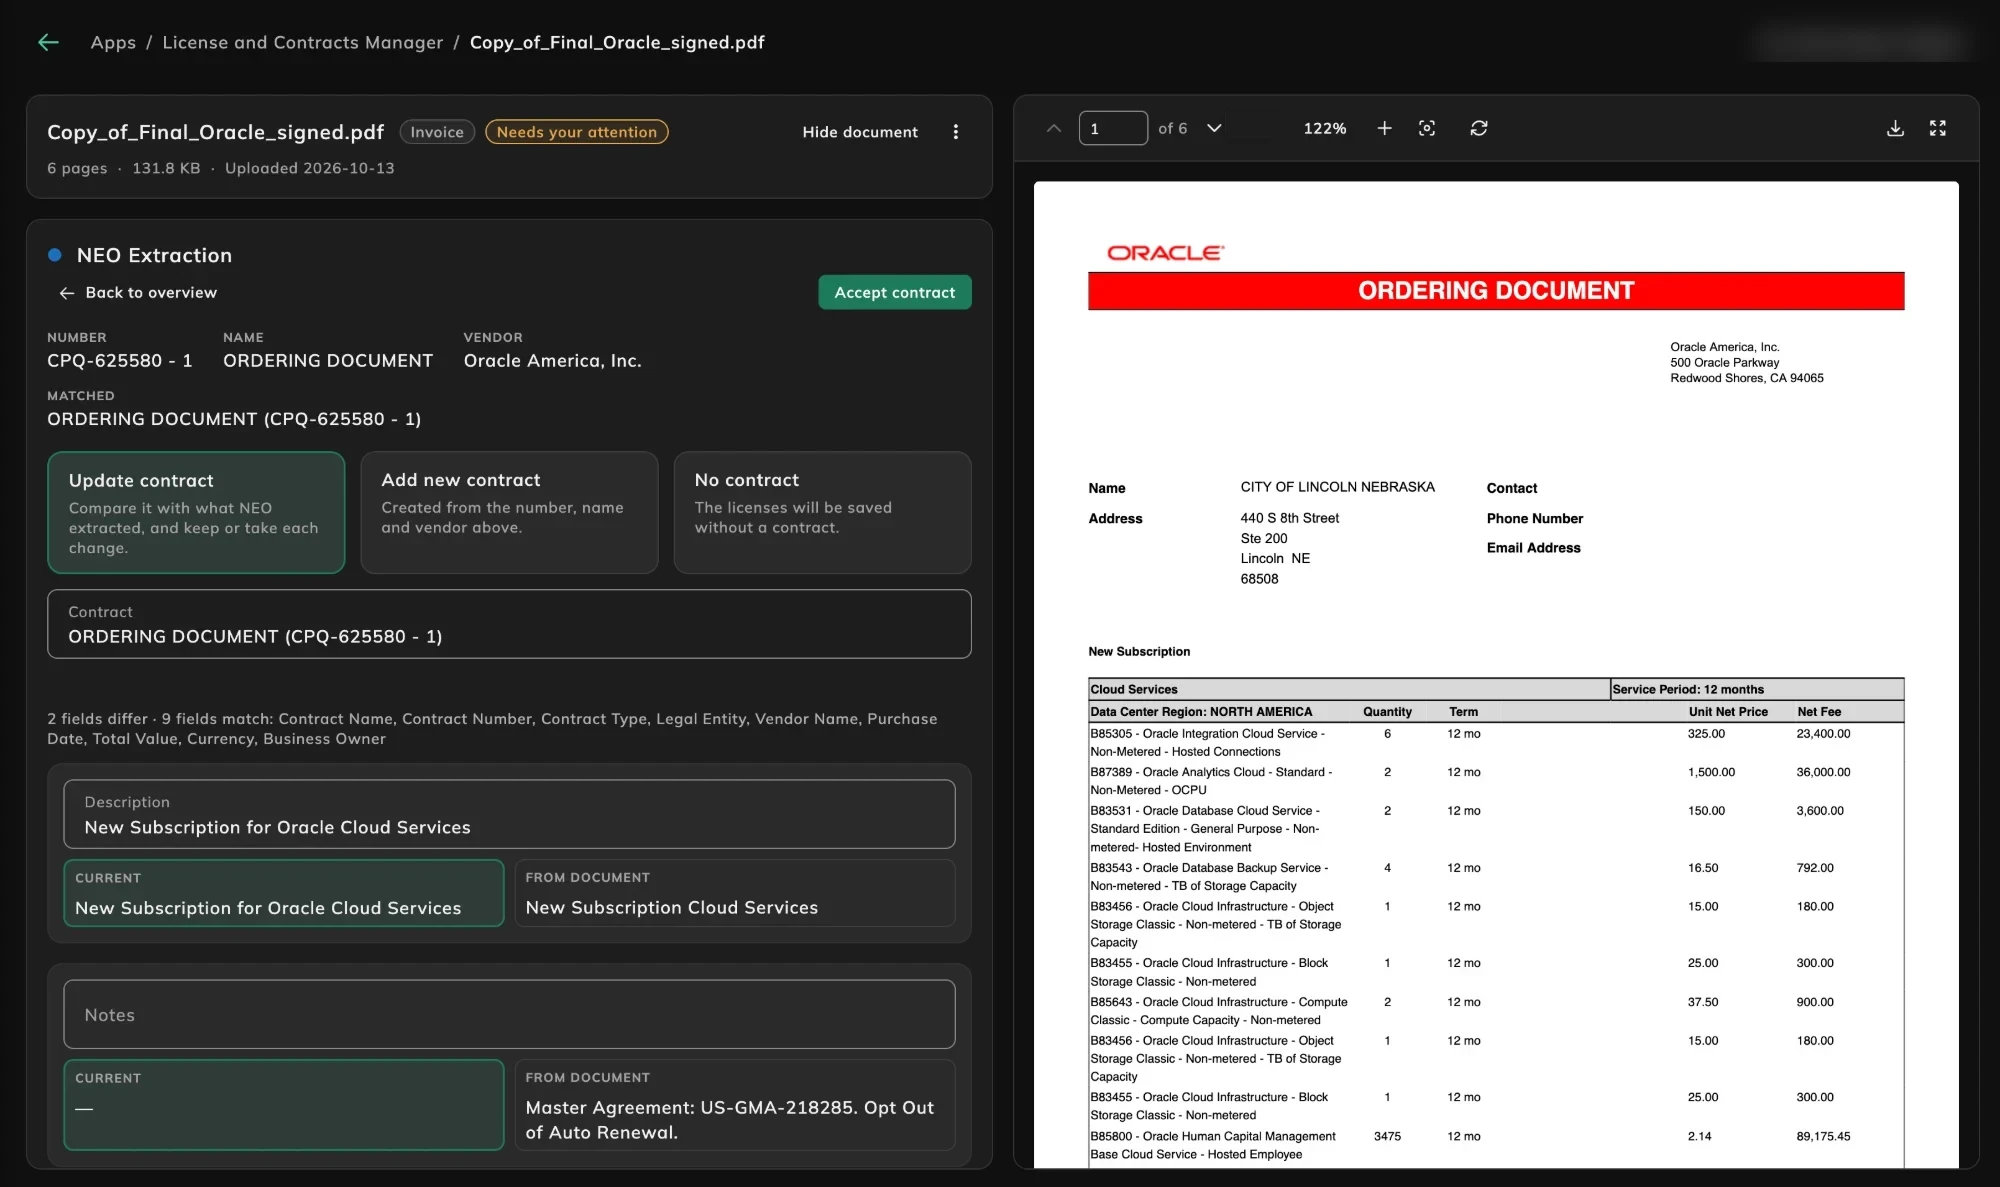
Section titled “Review the contract”Click Review on the contract, then choose what to do with it:
- Update contract: Compares the extraction with a contract you already hold, so you keep or take each change. You pick a contract you already hold.
- Add new contract: Creates a contract from the number, name and vendor NEO extracted.
- No contract: Saves the licenses without a contract.
If you choose Update contract, NEO asks you to select the Contract to update. If it found a match, that contract is already selected. NEO then lists which fields match and which differ. For each field that differs, it shows the Current value next to the value From document, with the page it came from. Select the value you want to keep, then click Accept contract.
If NEO finds no matching contract, Matched shows No record found. Choose Add new contract to create one from the extraction. NEO fills in each field and labels it with the page of the document it came from, such as Page 1. If the document does not contain a required value, NEO flags it in two places: a warning at the top of the form, such as Missing from the document: End Date, and on the field itself, which shows Enter end date. Type the value in yourself.
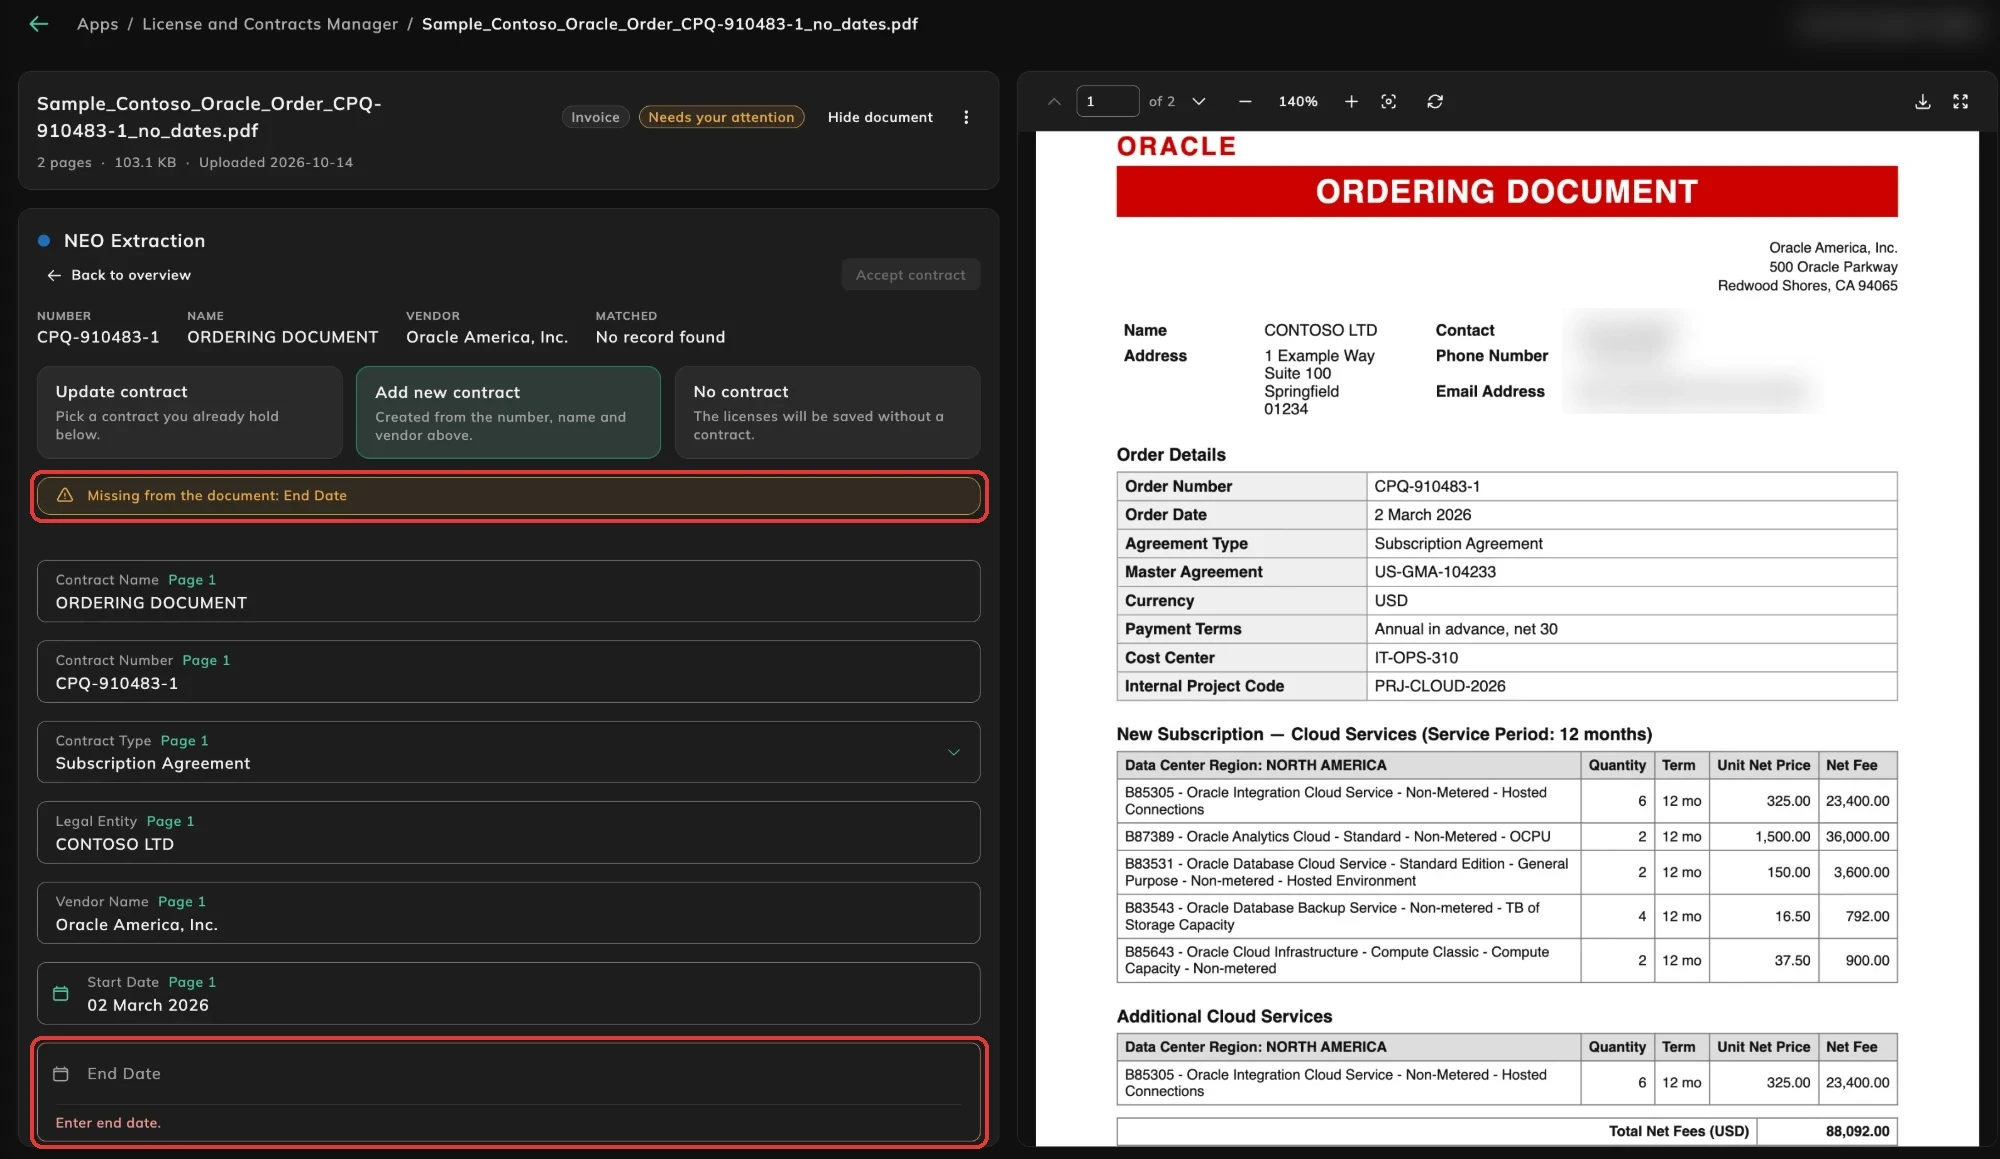
Accept contract stays unavailable until every required field is filled. Once they are, click Accept contract.
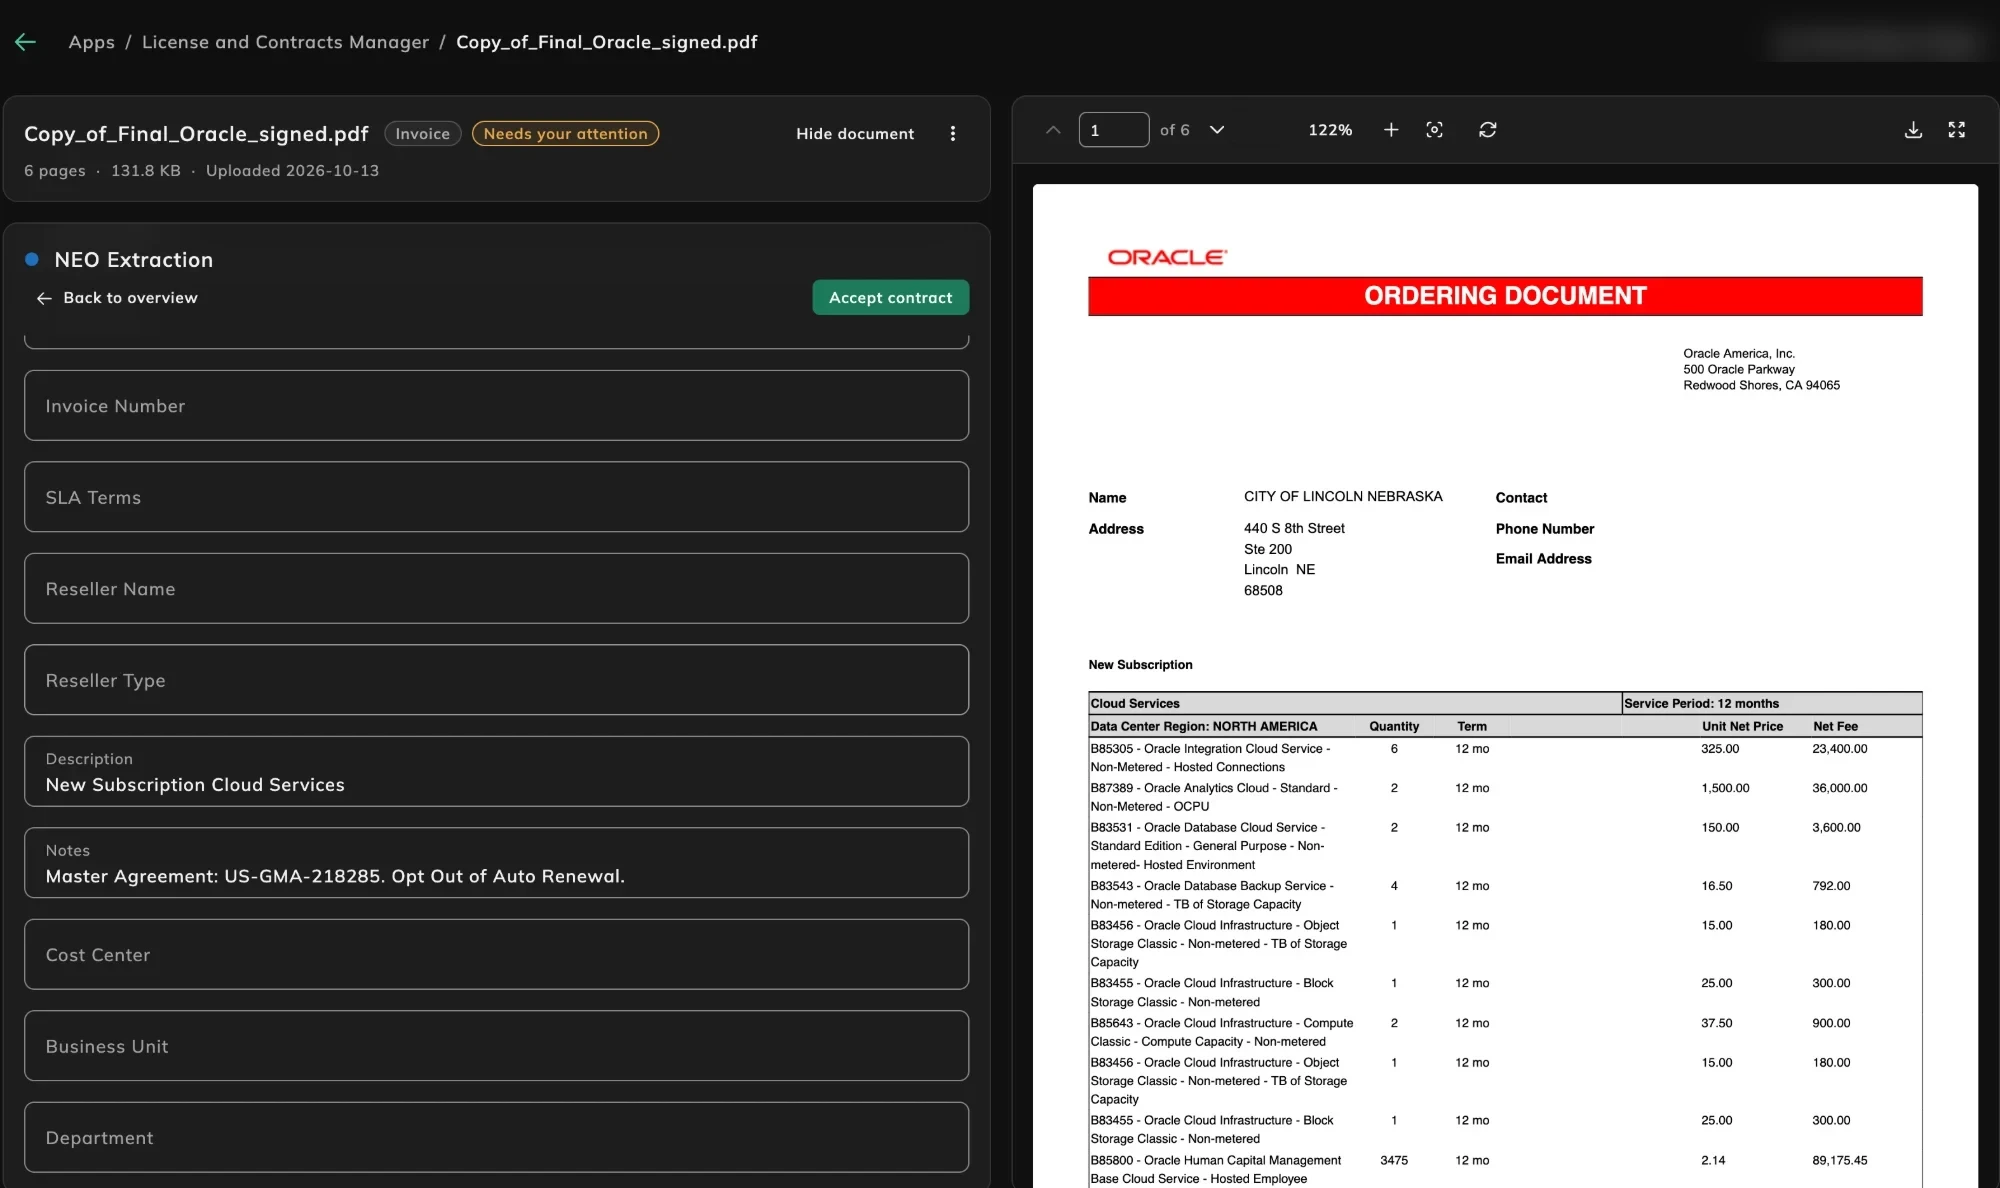
The form includes Contract Name, Contract Number, Contract Type, Legal Entity, Vendor Name, Start Date, End Date, Purchase Date, Status, Total Value, Currency, Renewal Notice Days, PO Number, Invoice Number, SLA Terms, Reseller Name, Reseller Type, Description, Notes, Cost Center, Business Unit and Department. A matched comparison can also name Business Owner.
Check your custom fields
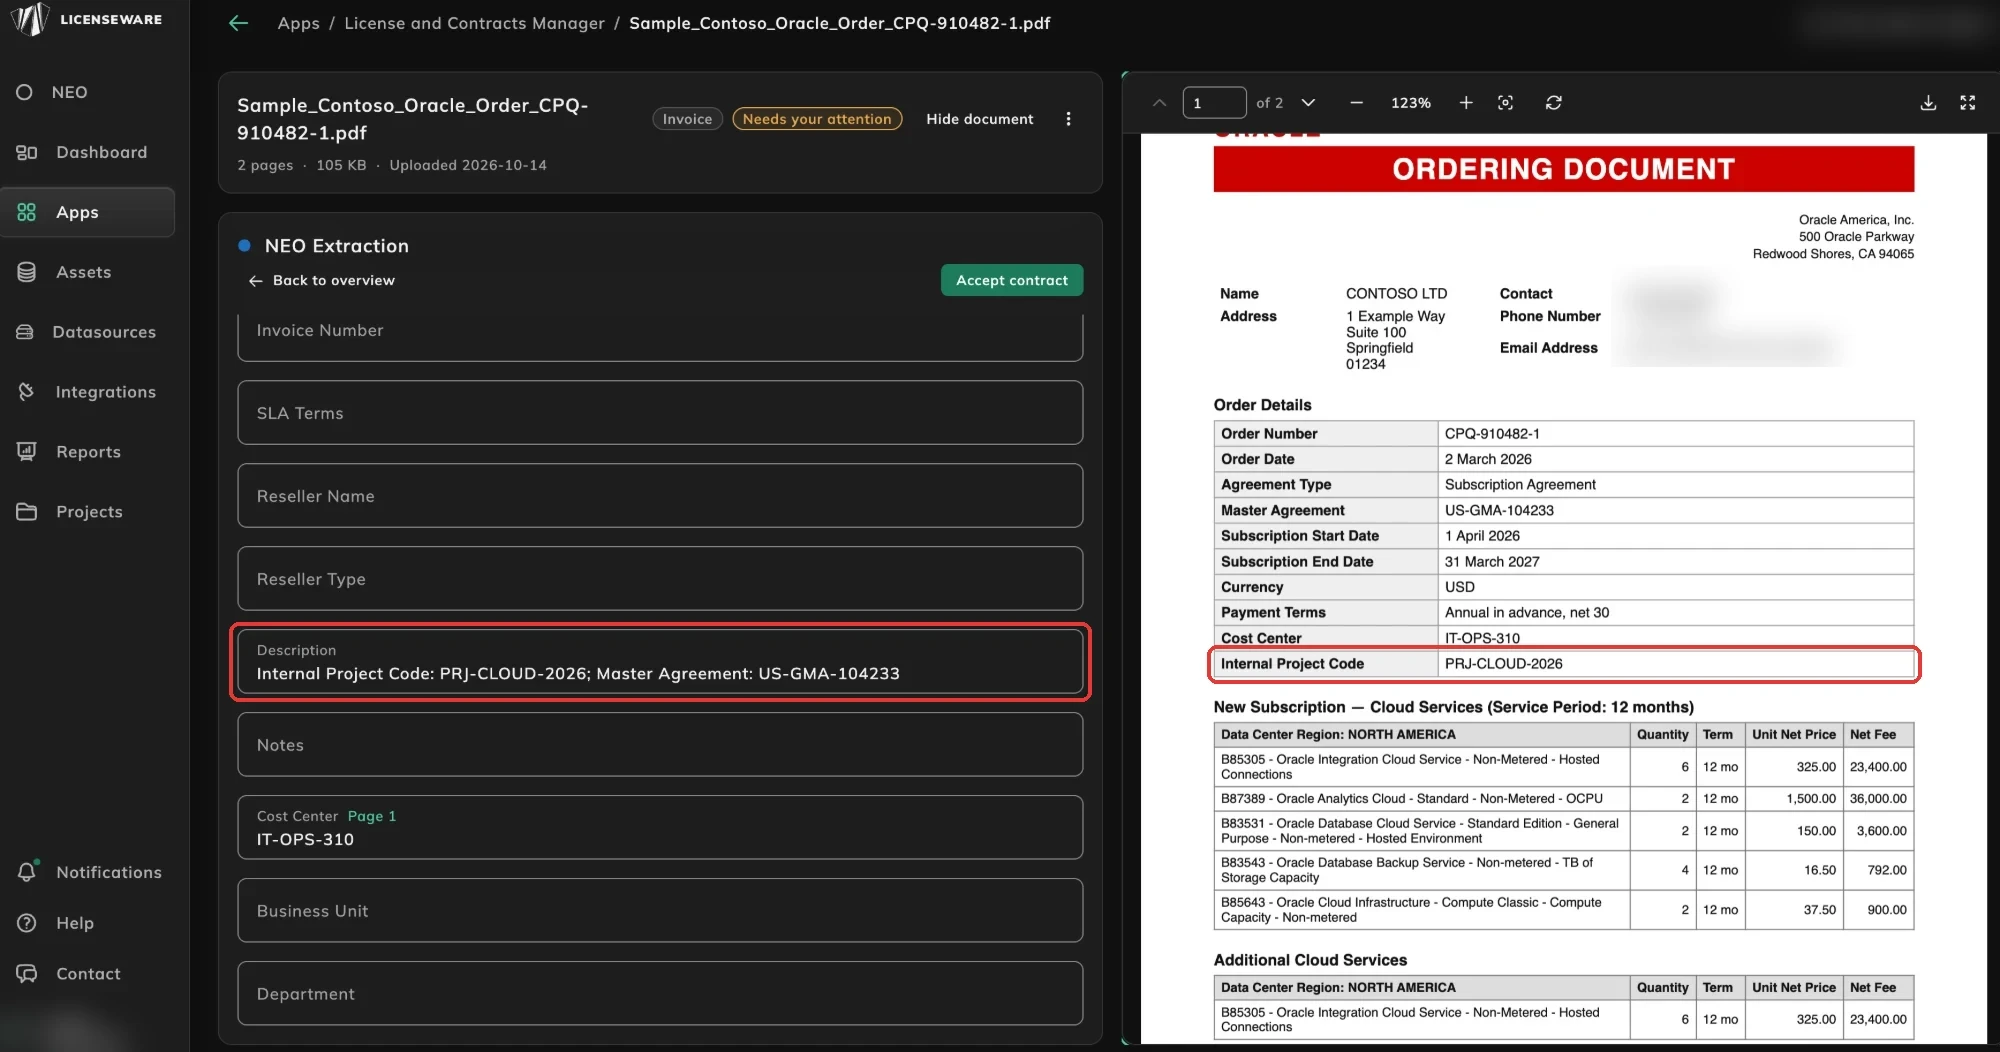
Section titled “Check your custom fields”NEO currently saves the values for your custom fields in the contract’s Description. In this example, Internal Project Code from the document ends up in Description alongside the master agreement number.
Review the licenses
Section titled “Review the licenses”Back on the overview, the contract is marked Accepted. Open each license to review it, or tick Add all licenses to take them all. A license row stays closed until the contract is accepted. The tooltip says Accept the contract first. For a new contract, every license is added as new under it.
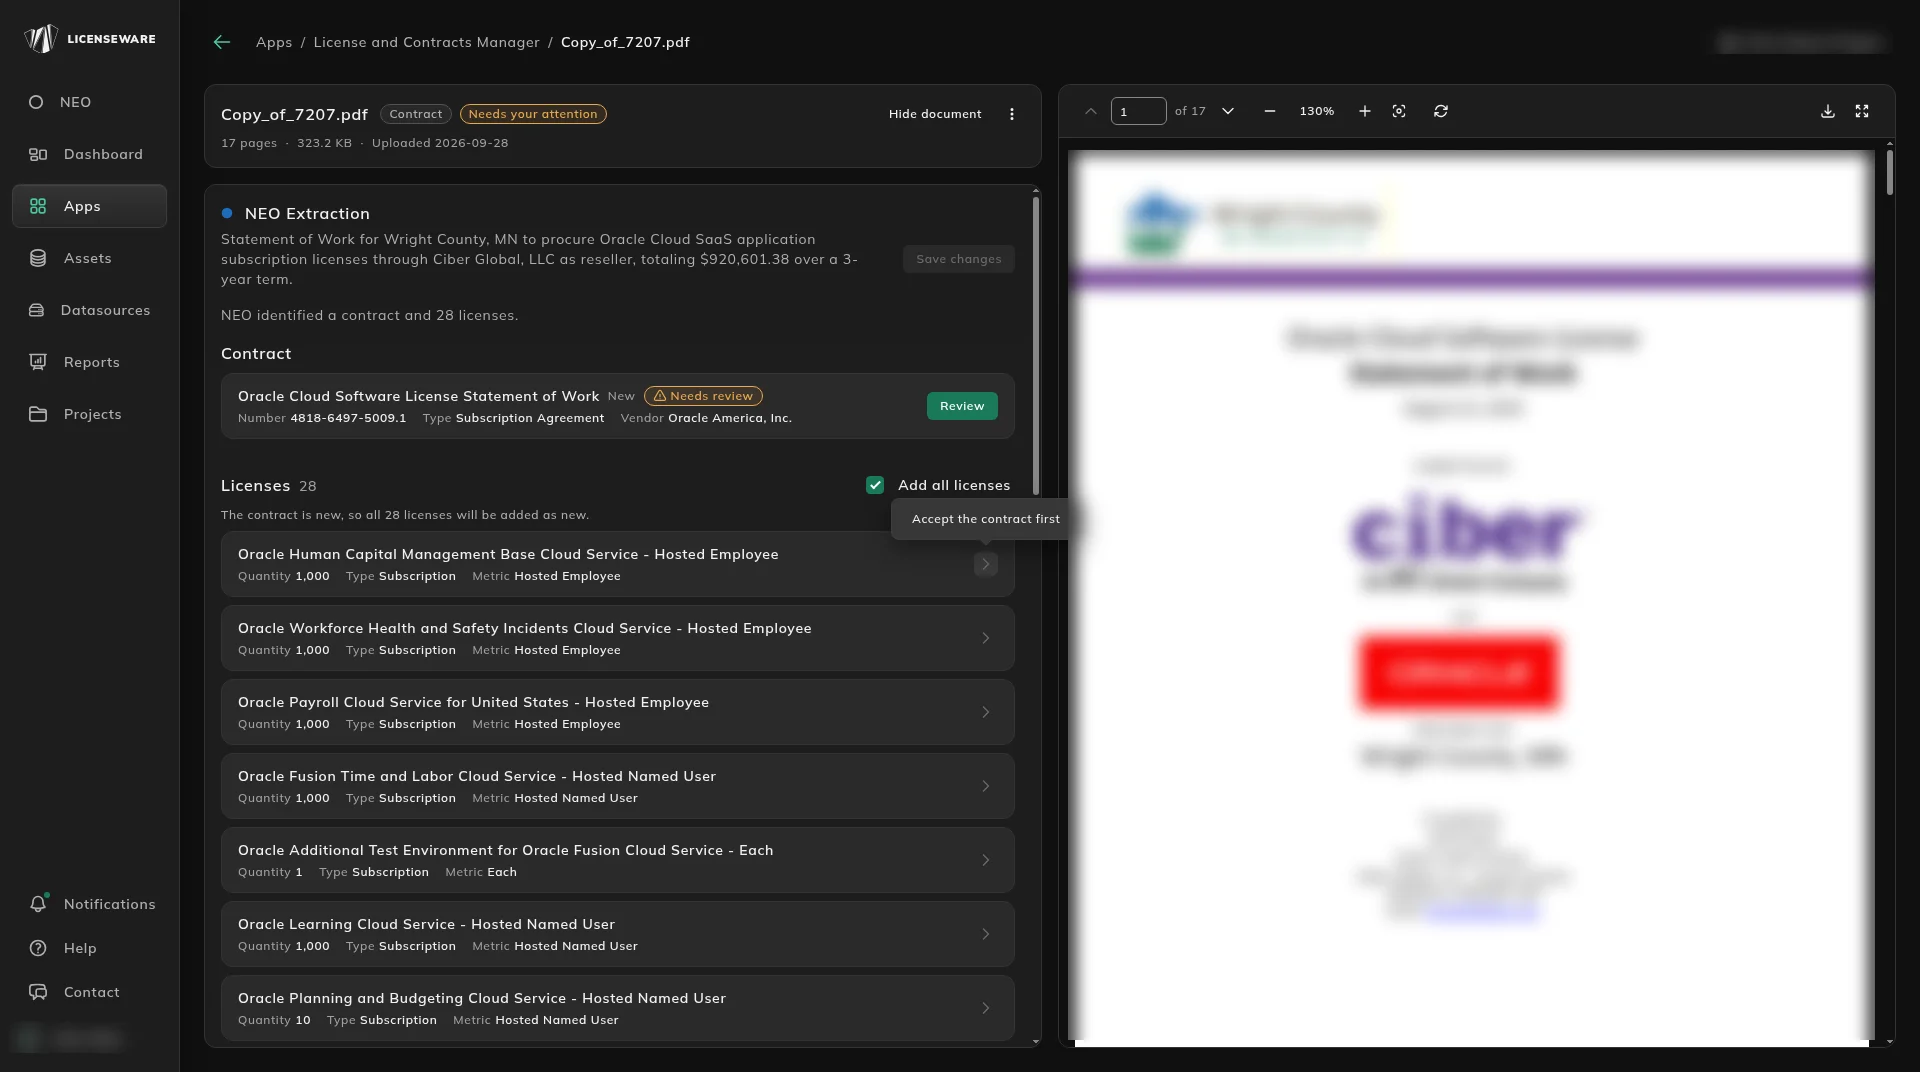
The overview sums up what will be saved, for example Will save: a new contract · 13 new licenses. Click Save changes. Licenseware creates the contract and adds the licenses under it. Save changes stays off until something is accepted.
Add custom fields to the contract template
Section titled “Add custom fields to the contract template”If your contracts carry information the standard fields do not cover, such as an internal project code, add it to the contract template before your next upload. For now, NEO puts extracted custom field values in the contract’s Description. See Check your custom fields.
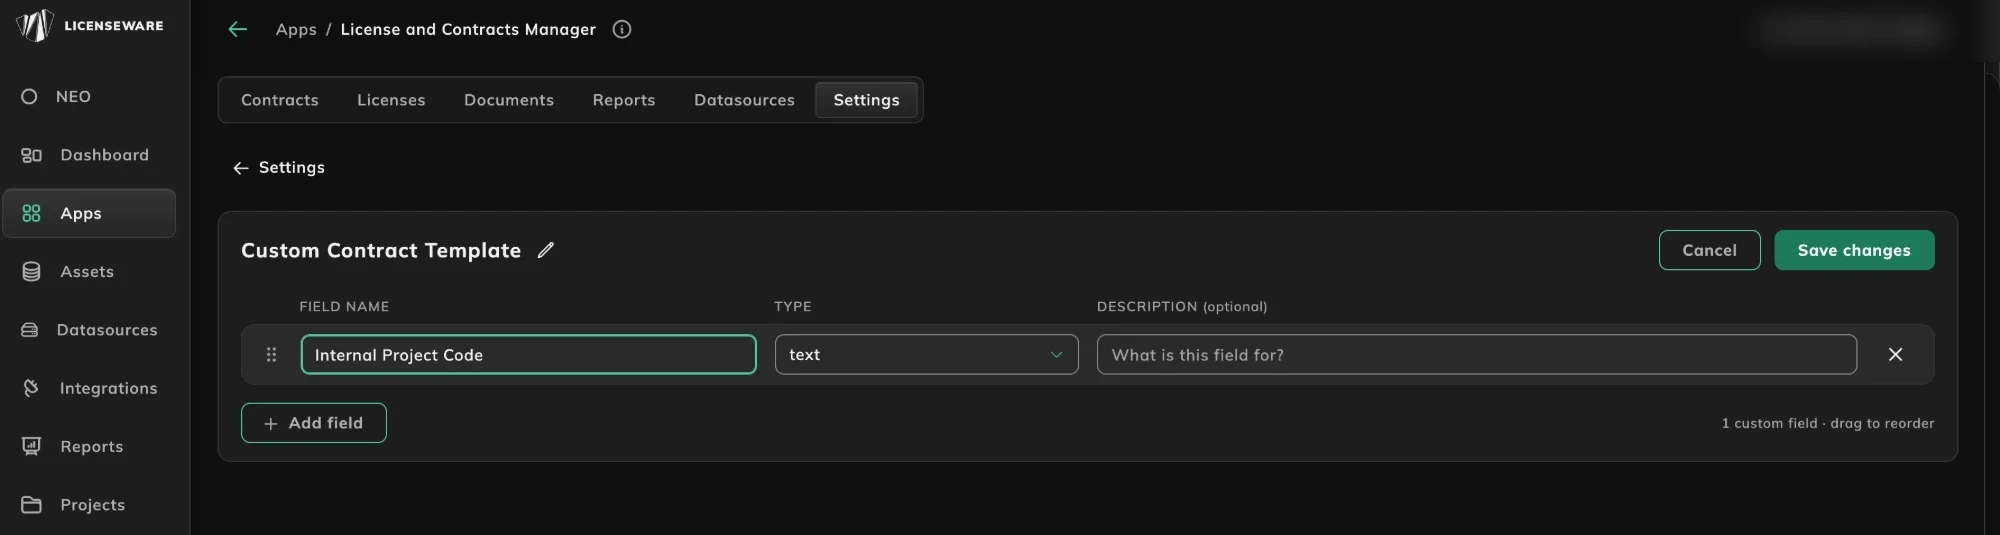
- In LCM, open Settings, then the Custom Contract Template.
- Click Add field.
- Enter a Field name, choose its Type, and optionally add a Description of what the field is for.
- Click Save changes. Add more fields first if you need them. Drag a row to reorder it. The x on a row removes that field.
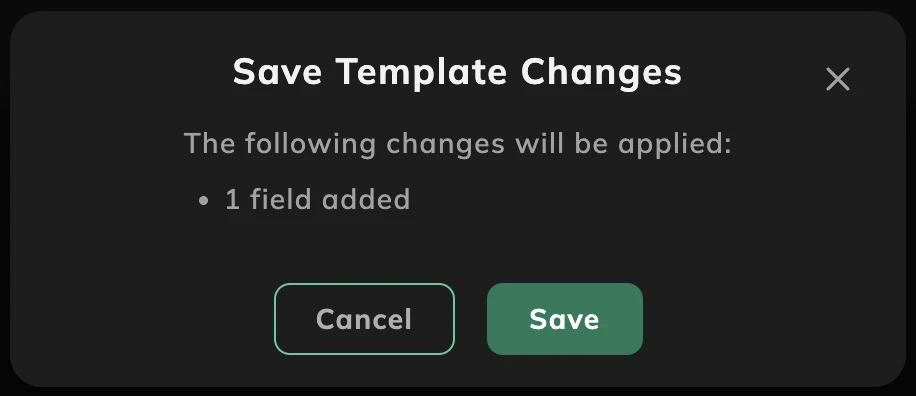
A confirmation lists what will change, such as 1 field added. Click Save to apply it.