
Add the fields your process needs
The standard form covers vendor, dates, value and renewal notice. Most teams also track something it does not: a cost center, an internal code, a project reference, an approval flag. LCM has two ways to store that, and the choice matters. One stays on a single record. The other becomes a column on every contract or license in the project.
| Per-record custom fields | Settings templates | |
|---|---|---|
| Where you add them | On one contract or license, while creating or editing it | Settings, on the contract template or the license template |
| Scope | That one record | Every contract, or every license, in the current project |
| Visible as a column? | No. Only on the record | Yes, on the relevant table |
| In the bulk upload template? | No | Yes, on the next download from this project |
| In reports? | No | Yes, as a dimension you can cut by |
| Field types | A free-text label and value | Text, number, date, dropdown, checkbox |
| Use it for | A one-off note, or a reference that belongs to one record | Anything you want to filter, sort or report on across the portfolio |
If you would ever filter, sort or report on the field, put it on a Settings template. If it is a one-off note that lives and dies with one record, use a per-record field.
Settings templates are per project. A field you add applies only to the project you are in. A second project, for example one per customer, needs its own template. That is intentional, because projects often need different schemas. It does mean copying the fields by hand if you want them to match.
Open Settings
Section titled “Open Settings”- Click Apps, then License and Contracts Manager.
- Click Settings.
The heading is Templates. The line under it is “Reusable sets of custom fields applied to contracts and licenses.”
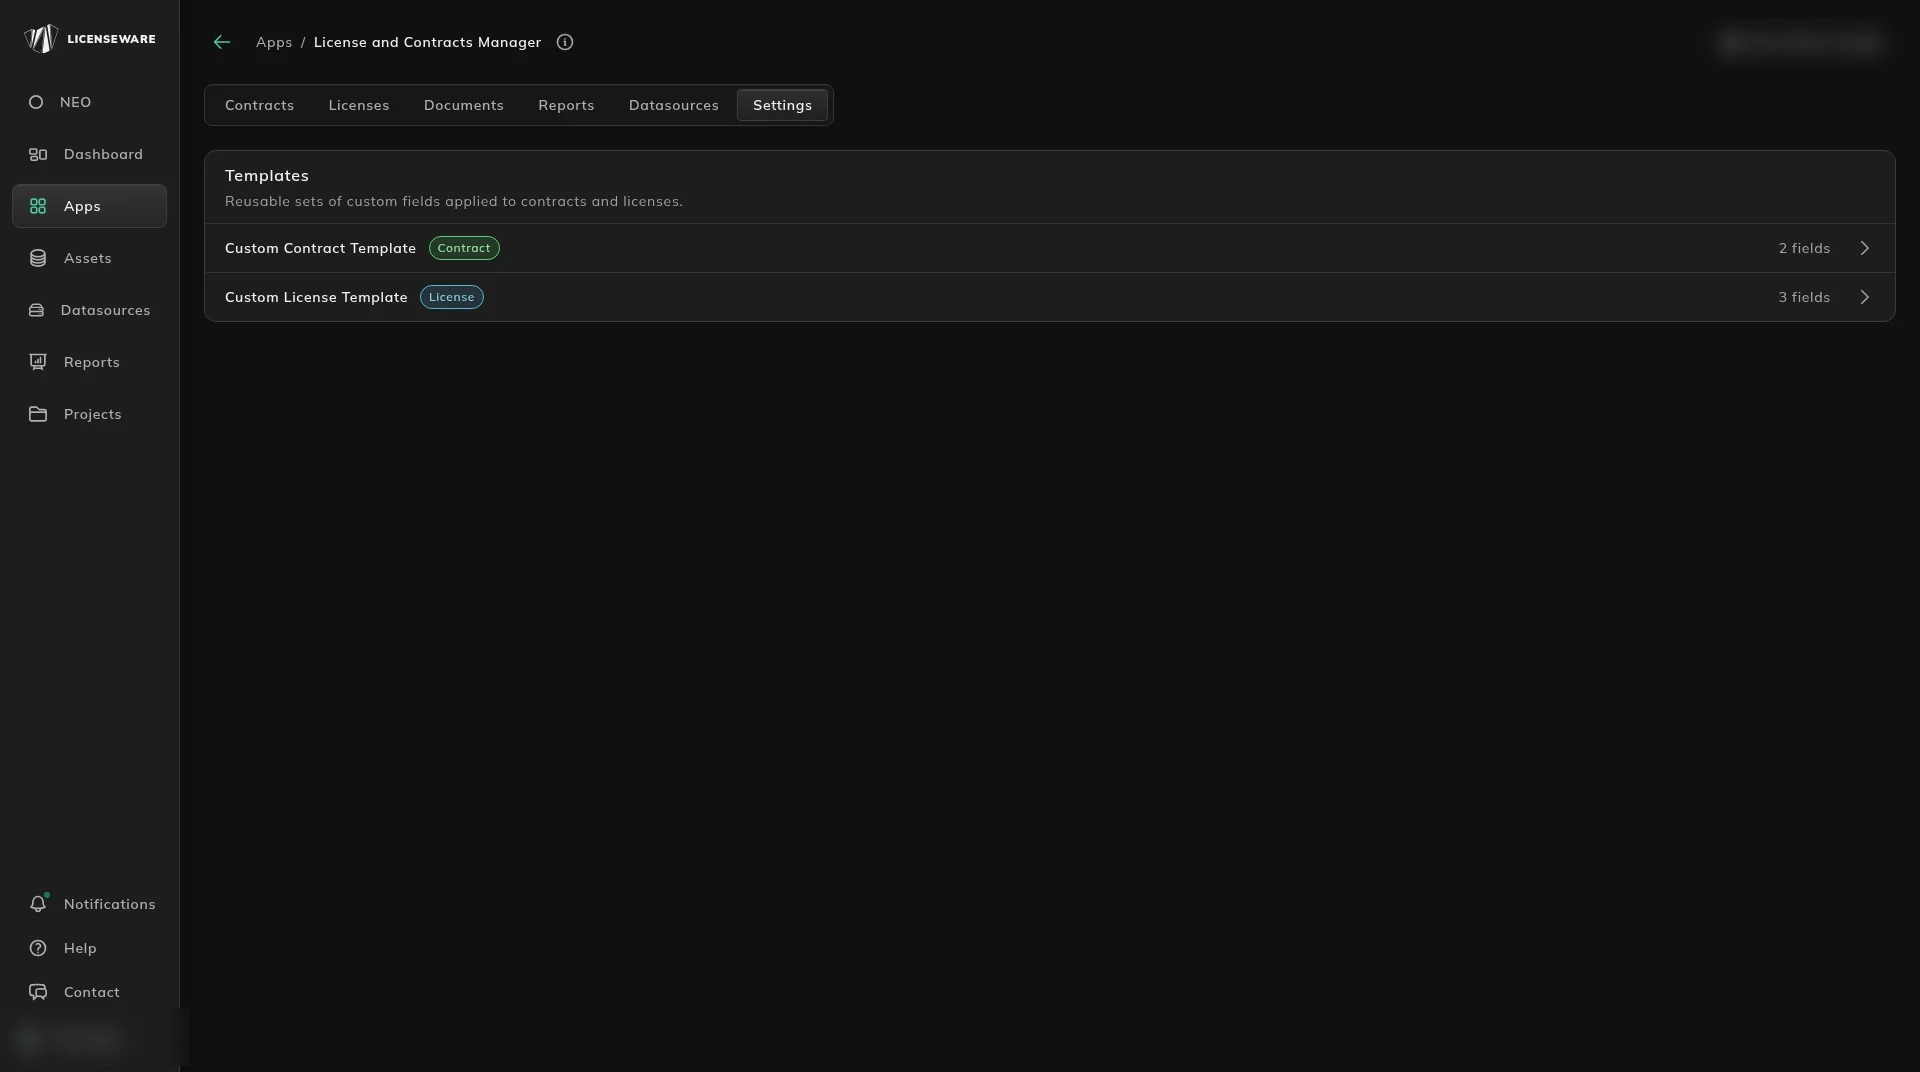
Two rows:
| Template | Badge | What it applies to |
|---|---|---|
| Custom Contract Template | Contract | The add-contract form, and Show details on the contract. |
| Custom License Template | License | The add-license form, and Show details on the license. |
Click the chevron on a row to open the editor.
Edit a template
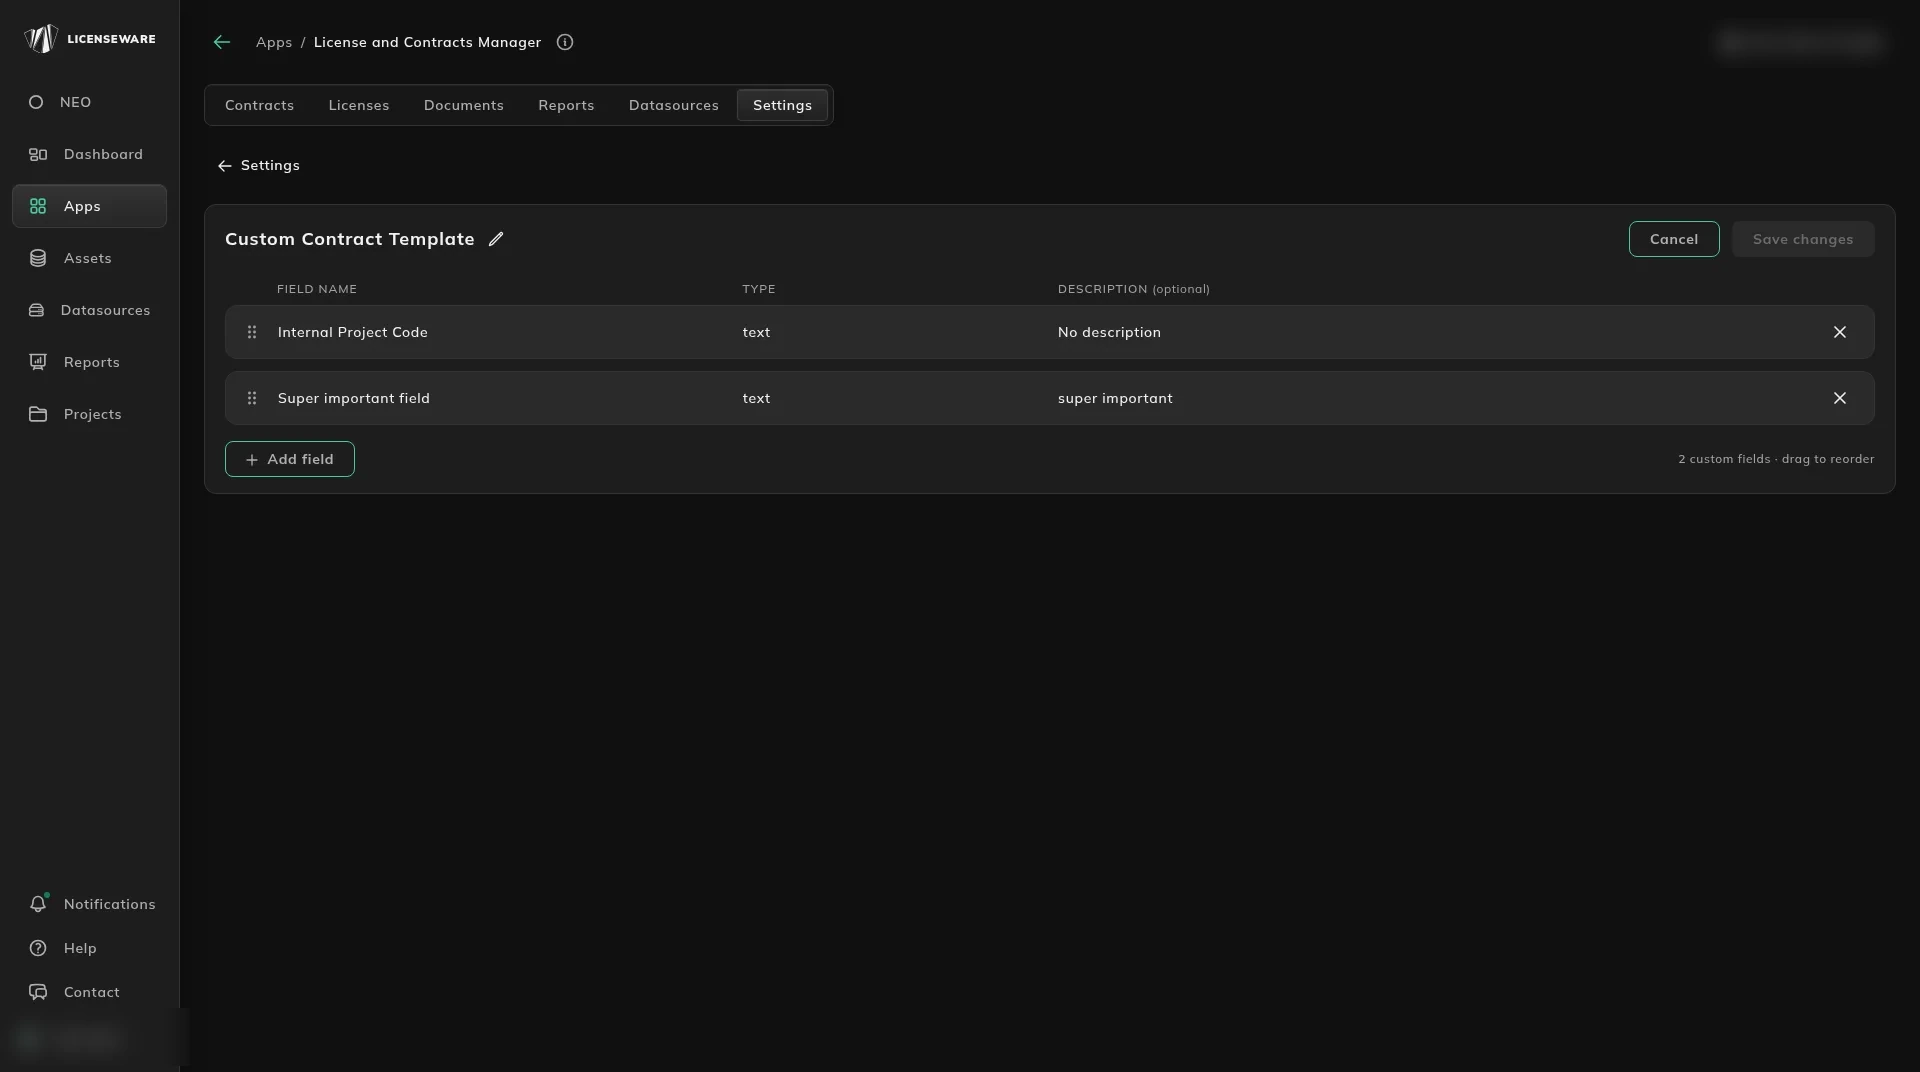
Section titled “Edit a template”To rename the template, click the pencil next to its title. Save changes stays off until you edit something.
Each field has FIELD NAME, TYPE and DESCRIPTION (optional), a drag handle, and ✕ to remove it. + Add field adds a row. ← Settings goes back.
The fields already on this template are type text:
- Contract: Internal Project Code, Super important field.
- License: Custom license field, Demo Text, Project.
Those names then show at the bottom of Add Contract and Add License. An empty custom field on the contract page is a dash.
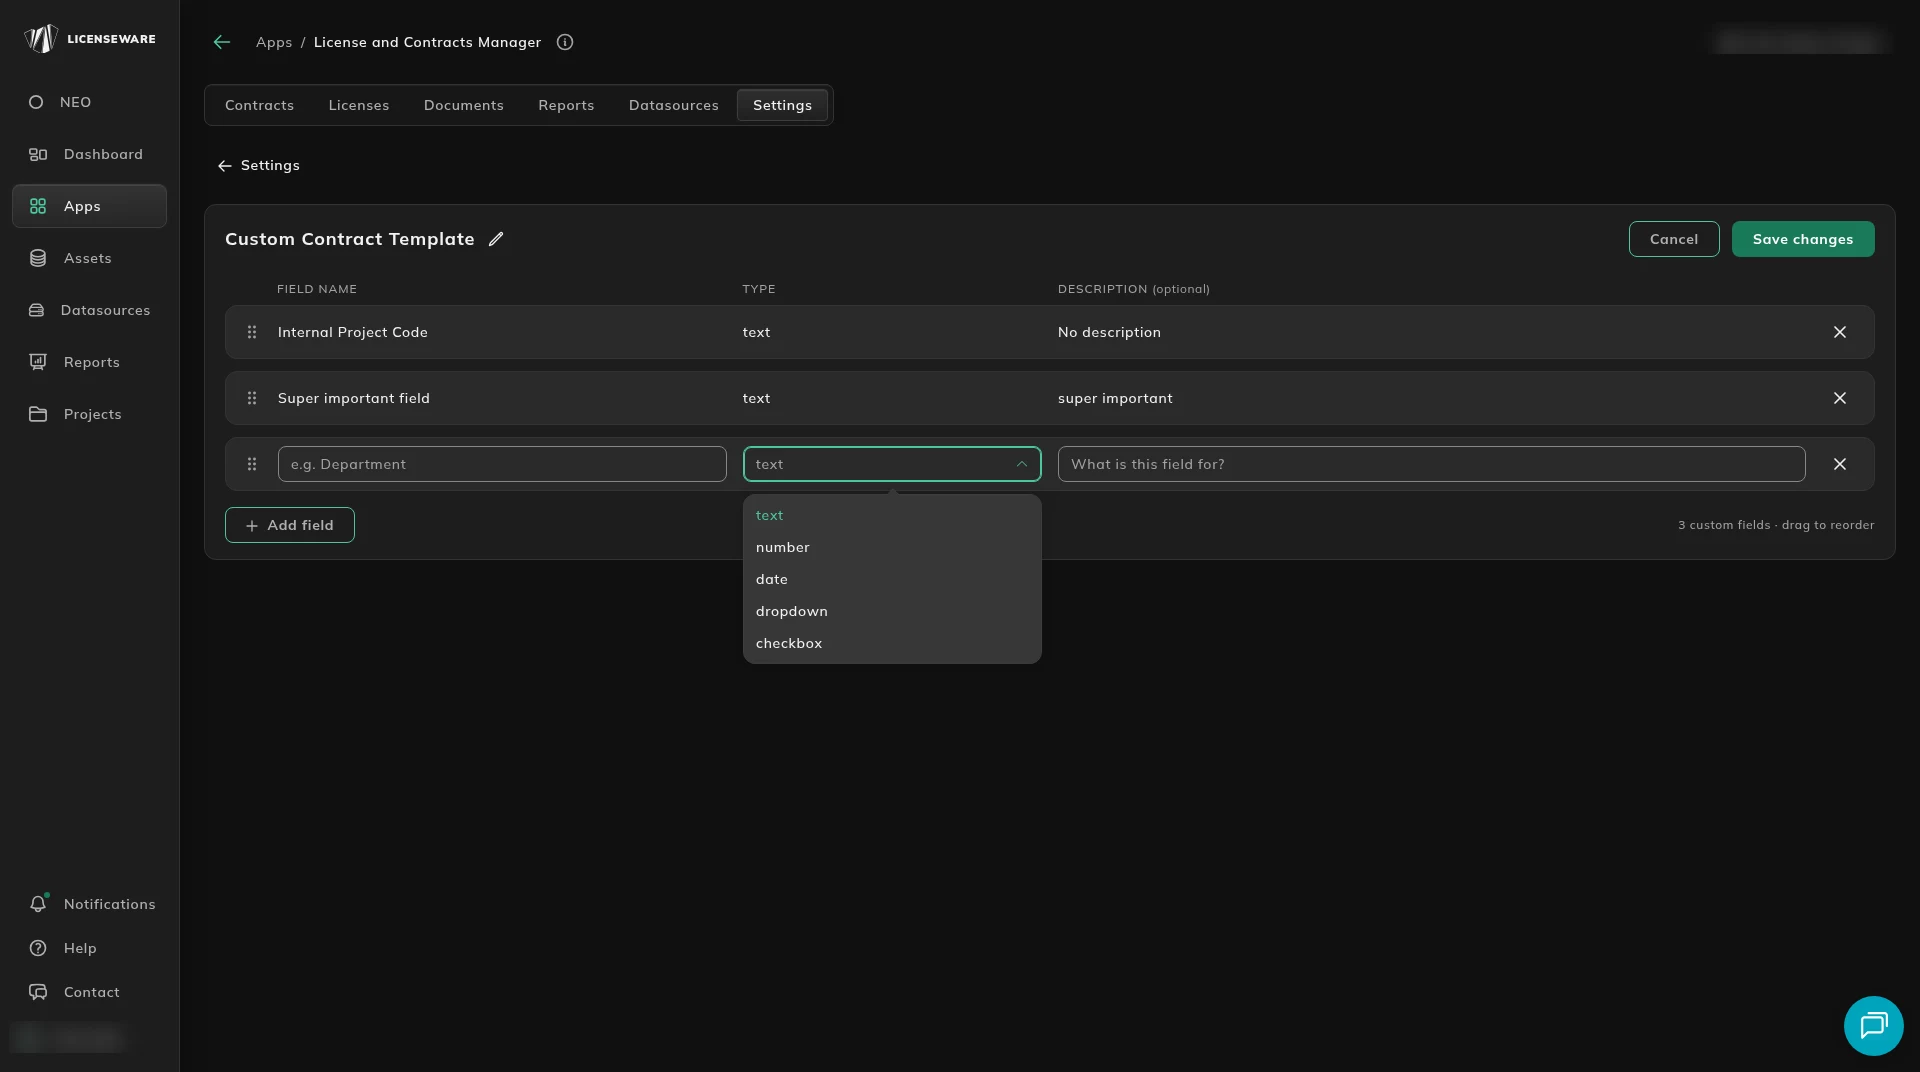
TYPE on a new row is text, number, date, dropdown or checkbox.
Per-record fields
Section titled “Per-record fields”A per-record field is a label and a value at the bottom of the create or edit form. It is stored on that record only. It does not appear on other contracts or licenses, it is not a column on the LCM template, and it is not a dimension on the reports.
- Open a contract or license, or start a new one.
- Scroll to the custom fields at the bottom of the form.
- Enter a Label and a Value.
- Click Add Fields for another row, or remove a row with the ⊗ icon.
- Click Create, or Save when you are editing.
Use one for a legal note that belongs to a single agreement, a temporary flag during a migration, or context you do not want anywhere else. The license and contract forms already include this row. See Add a license.
What a template field changes
Section titled “What a template field changes”When you add a field to a Settings template:
- It appears as a new column on the relevant table.
- It is on the bulk upload template the next time you download it from this project.
- It appears on existing records as well as new ones, empty until you edit the record or upload a value.
- It becomes a dimension on the LCM reports. Cost Center, Business Unit and Department already drive several cuts on Software Licenses & Contracts.
To add one: open Settings, choose the contract template or the license template, click + Add field, and enter the Field Name. That name becomes the column header and the bulk upload column.
Choose a Field Type:
- text, free-form text
- number, a numeric value
- date, a date picker
- dropdown, a fixed list, entered as comma-separated values such as
High, Medium, Low - checkbox, true or false
Prefer a dropdown or a date when you want clean reporting. Use text only when the values are genuinely free-form. A dropdown charts as categories. A text field is harder to chart.
You can edit or remove a template field from Settings. Before you remove a field that already has data, export the table so you keep a copy of the values.
A worked example
Section titled “A worked example”You manage two projects, one for your own organization and one for a managed-service customer.
Procurement wants every contract tagged with a cost center and an approval tier, and every license tagged with whether it has been checked against an entitlement export.
On your project’s contract template, add:
cost_center, textapproval_tier, dropdown, valuesTier 1, Tier 2, Tier 3
On the license template, add:
entitlement_validated, checkbox
After you save, every contract row has Cost Center and Approval Tier columns, and every license row has Entitlement Validated. The next template you download from this project includes all three. Existing records stay empty until you edit them or upload a populated file. Software Licenses & Contracts can then show spend by cost center, and Data Completeness flags contracts where Cost Center is empty.
The customer project needs its own Settings template, even if the customer wants the same fields. Template definitions do not copy across projects.